KWA M9 PTP Review

I recently received a KWA M9 PTP (Professional Training Pistol) so I figure I’d write a quick review on it. 🙂 According to KWA the M9 PTP has been totally redesigned for better gas efficiency and reliability but since I do not have access to a first generation KWA M9, I can’t do a direct comparison. The gun is suppose to be a 1:1 copy of the real M9 and weighs in at ~1kg, one nice feature is that the weight is not all in the mag and it’s pretty well distributed.

M9_Side1.jpgM9_Side2.jpg

In typical KWA fashion, the gun is devoid of trademarks but that’s normal. The M9 PTP comes with a hefty metal receiver and slide but the outer barrel is plastic. The colour of the receiver is very slight matte brownish, the slide is a flat black and the outer barrel is matte flat black. The combination may bother some, but I don’t care much.

M9_SlideBack.jpg

On the err left hand side of the gun there’s the slide starting at the top right is the safety switch, there’s the slide lock, slide/barrel lock, trigger and mag catch button. On the right side we find the other side of the ambidextrous safety switch and a button (just below the circle near the middle of the gun) which needs to be depressed to disengage the slide/barrel lock.

As with all other GBB’s when the gun is empty the slide locks back, pop in a new mag, flick the slide lock down and you’re ready to rock and roll. The KWA M9 PTP is a double action pistol which means you do not have to rack the slide or cock the hammer to fire (although your first shot will be dry because no BB is chambered). One nice feature of the M9 PTP that no other airsoft M9’s have is its functional safety decocker (KWA is wrong when it says it’s the only one with this feature, KSC and WA M9s also support this). If the hammer is locked back, flick the gun to safety and the hammer will jump back into the forward position.

M9_Safety.jpgM9_Hopup.jpgM9_HopupTool.jpg

To access the hopup pull the slide back and lock it into place, once that’s done you’ll need the hopup adjustment tool (the one that comes with all KSC/KWA GBBs). It’s fairly simple to do but of course that means if you want to adjust your hopup on the field, you’ll need to carry it with you and it’s small and easy to lose unfortunately.

M9_Disassembled.jpgM9_Barrel.jpg

Taking down the KWA M9 PTP is very easy simply eject the mag, press the button on the right side, turn the slide/barrel lock and the slide the whole assembly forwards. To take out the barrel first remove recoil rod and spring, slide the barrel forward a bit so everything clears the nozzle then pull backwards. The inner barrel and hopup assembly is held in place with a pin so you’ll have to remove that first to get the whole thing out. The inner barrel looks like a normal KSC/KWA as does the hopup rubber. I think aftermarket rubbers (if they’re available) and regular aftermarket KWA M9 inner barrels would be compatible but I don’t have any to test compatibility with. If you lost your hopup adjustment key, you can adjust it now with your fingers.

M9_Sights.jpg

The iron sights are integrated into the pistol slide and are not adjustable but they’re very easy to use. The white dots make lining the gun up extremely fast and it’s possible to sight things with both eyes open.

Performance

Heh finally the good stuff… 😉 The blowback of the KWA M9 PTP is nice and crisp, although it’s not strong, there’s less recoil than with my wife’s KSC Glock 19. According to KWA the M9 PTP is suppose to fire at 325 fps with 0.2g BBs when using propane but my Guarder Speeder 2000 records a muzzle velocity of 360 fps! With 0.25g the gun was shooting 350 fps and with 0.28g chronies 340 fps (same energy as ~400 fps with 0.2g!) GBBs are variable energy weapons which is why the heavier BBs have more energy.

The KWA M9 PTP requires a custom mag (second generation M9 mag) and is not compatible with first generation magazines. The KWA M9 PTP mag holds 25 rounds and in my condo at ~20 degrees Celsius I can get 30 shots from each gas fill. Not exactly the best gas efficiency but I guess it uses a lot in order to get that high muzzle velocity. KWA touts this new fill valve which it claims prevents gas from escaping during fill up, personally I prefer the old TM/KSC design as you know when the mag is full. With this one, I try and listen till the propane tank stops making noise or leave it for five seconds.

M9_1911.jpg
It’s about the same size as my TM M1911A1

I have yet to game with the gun so I cannot comment on its accuracy however KWA/KSC generally aren’t bad. I’m hoping that I can get its consistency up to TM levels but I guess that will have to wait for the spring outdoor season as the KWA M9 PTP fires too hard for TTAC3 (350 fps with 0.2g maximum). It’s new so there haven’t been any problems yet but when they arise I will be sure to post them. The KWA M9 PTP has a lot of potential, too bad I won’t be able to try it out till spring.

Apr 27/08 Edit: Please check this out too for an update on the KWA M9 PTP.

Jing Gong / Echo-1 MP5K PDW Review

Over the weekend, a friend brought over his newly acquired Echo-1 MP5K PDW for me to check out. We both own TM MP5Ks and was wondering how the Echo-1 would stack up. Externally besides triangle E1 trades, it looks identical to a TM MP5K. About the only thing I noticed was that the bullets for the fire selector don’t look quite as well defined as on a TM but I know I’m being picky there. 😉 Some of the pictures are clickable for higher res versions.

MP5K1_1000.jpgMP5K2_1000.jpg
Batt.jpg

Anyway the gun comes with a wall battery charger, an 8.4V 1100mAh NiMH battery, a low profile metal scope mount (installed backwards from the factory), some BBs, manuals, a short 20rd low cap mag and a long metal hi cap mag so you’re ready to go if you’re a novice or new player. The QD flash hider and smaller flash hider are painted neon orange as required by US law but not necessary here in Canada.

I forgot to weigh the gun but it’s approximately the same weight as my TM MP5K and size wise the gun is the same. The PDW stock fit my TM just fine, it looked so good I didn’t want to give it back. 😉 Parts from my TM MP5K and the Echo-1 MP5K PDW were cross compatible, from mags to batteries and that awesome stock. Note, with the Echo-1 it was quite difficult to install the 8.4V stick battery because the stopper rail on top of the mechbox was bent awkwardly and brushing/scraping against the battery.

The gun is extremely loud when firing but I’ll be honest I had my doubts in terms of what the BB velocity would be after all the difficulty I had when trying to upgrade my TM MP5K. I loaded a low cap full of 0.2g BBs and let err rip. To my surprise according to my Guarder Speeder 2000 chrony, the gun was firing 340 fps out of the box! Shots varied a bit more than I would have liked between 330-340 on average but that’s rather impressive from a gun that’s so inexpensive.

Of course I can’t leave well enough alone so I decided to take the gun apart and take a peek inside. Tear down is exactly the same as with a TM MP5K and after removing the motor, I was greeted by this thick sticky paste that was plastered all over the motor. The mechbox at least from the outside looks like well a MP5K ver 3 mechbox.

Mech1_800.jpgMech2_800.jpg
Motor.jpg

Like with the JG G36C I reviewed earlier, the Echo-1 MP5K is full of sharp edges everywhere and if you’re not careful you can cut yourself quite easily. Definitely use caution when working inside this gun.

Mech3_1000.jpgGears_1000.jpg

Here is how the mechbox looks when opened up and here’s a breakdown of all the major internal components. Echo-1 uses metal bushings, metal gears (which are not marked CA but weight wise are heavier than TM gears), plastic spring guide, plastic piston, plastic ventilated piston head. Echo-1 is suppose to have regreased the internals (and cleaned up the mess JG makes) however the gears had the smallest film of sticky green substance on it. I won’t call it a grease because at room temperature anyway the residue was almost a semisolid. I don’t know if other Echo-1 guns are like this, the MP5K PDW is the first of this brand that I’ve seen.

MP5K3_1000.jpg

Unlike with the JG G36C there were no major problems internally with the electrical system or externally with the Echo-1 MP5K PDW. I cannot comment on its durability because it’s a brand new gun. Hopefully the thing will be as problem free as the JG G36C that I looked at earlier in the year. My friend who bought this gun is hard on his toys and always gives me the most “interesting” problems to diagnose. If there are any failures, I will update the review accordingly. 🙂

Classic Army MP5A5 AEG Review

A few months ago I picked up a CA MP5A5 to use for the zombie game, I figure it was the perfect weapon since it’s small enough for CQB yet has decent range at longer distances. Unfortunately I survived the whole night and never got to use it for its intended purpose, pity. Anyway after playing a few games with it here’s a small review on the gun.

The CA MP5A5 comes out of the box shooting ~310 fps with 0.2g BB’s and a metal high capacity magazine that can hold 200 BBs. It comes with two flash hiders, the smaller three pronged version and the larger Navy flash hider.

MP5_1.jpgMP5_2.jpg

As you can see I picked up the version with a flashlight foregrip. The gun itself is ~3kg in weight and virtually everything except the pistol grip is metal. My initial impression of the gun is good and it feels very solid to hold. Cosmetically the gun is nice but the details are not as good as with the TM AEGs.

Grip.jpgSelector.jpg

As you can see there are rough seam lines in the pistol grip and the safety, semi and auto markings are not well defined. Next when switching firing modes you cannot feel when the gun changes, nor does it make the familiar click. With TM or ICS, there’s a click and you can feel it thoroughly engage.

Hop.jpgLight.jpgSerial.jpg

Here’s the good. 😉 CA redesigned the hopup for the MP5 and the nozzle makes a much better seal with the hopup unit for more consistent shots. Next the cocking handle actually serves a purpose and it opens the ejection port which allows you to adjust the level of hop. The metal body is the best that’s available on the market and it’s even better than CA’s previous design. The flashlight foregrip uses two 3.0V CR123A batteries (not included) and has a light output of 65 lumens. It’s not super bright but it’s good enough for CQB and definitely better than LED or regular flashlights. CA gives all of its MP5s a unique serial number, it doesn’t do much for me but I know it makes others feel special.

Screw.jpgEasy.jpg

CA uses the same quick take down body design as ICS. After you remove the sliding stock unscrew the plastic tab that houses the power cables then slide the mechbox out through the rear. Remove the selector pin, take out the motor and unscrew the mechbox from the pistol grip and you’re ready to go inside.

Mech2.jpgMech1.jpgMech3.jpg

The CA version 2 mechbox is reinforced by default and you can really feel its heft. The mechbox also comes with metal bushings, reinforced gears, plastic piston and a ported plastic piston head. Most AEGs come with plastic spring guides and that was replaced with a Guarder metal ball bearing model. I also replaced the CA piston with a polycarbonate Guarder piston, the CA piston head with a Prometheus piston head and the stock spring with a Guarder SP100. CA does a decent shimming job however I had to spend about an hour fine tuning it. The last performance upgrade that was done was to swap out the stock CA MP5 inner barrel with a Systema 6.04mm MP5 length barrel.

After the upgrades were done the CA MP5A5 fires a very consistent 350-355 fps with 0.2g BB’s according to my Guarder chrony. 🙂 In terms of accuracy it’s not great due to the short barrel but I can hit a person sized object at around 80’ fairly easily.

I haven’t gamed with it too much so I can’t comment much on its durability but it’s CA so it should be pretty reliable… If there any big developments of course I’ll post an update.

Jing Gong G36 AEG Review

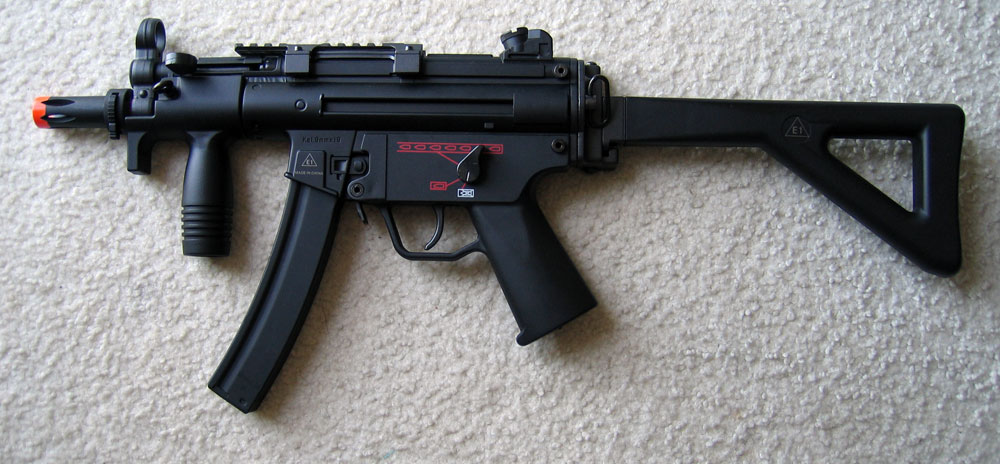
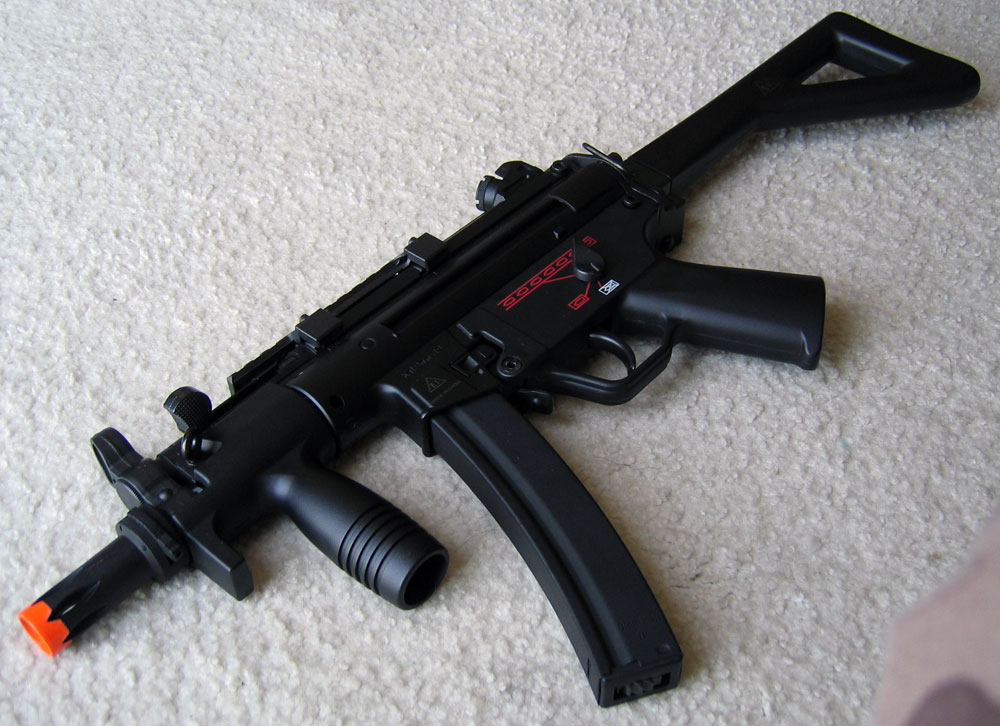
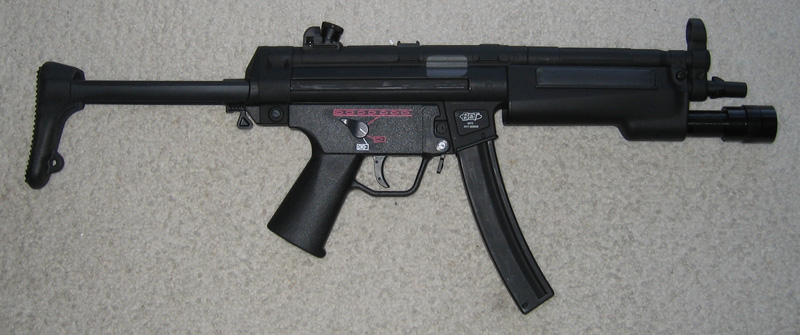
Here is the “long “ anticipated review of the Jing Gong G36C AEG, I know a few guys emailed me about it so here it is. 🙂

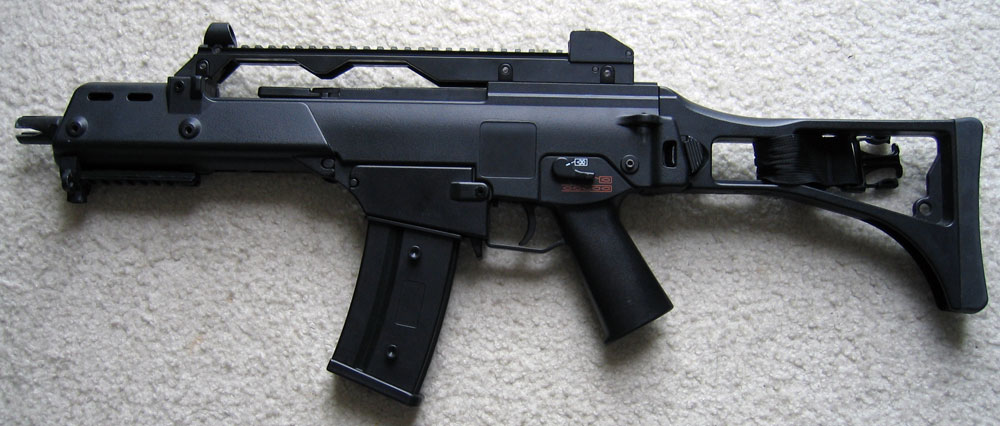
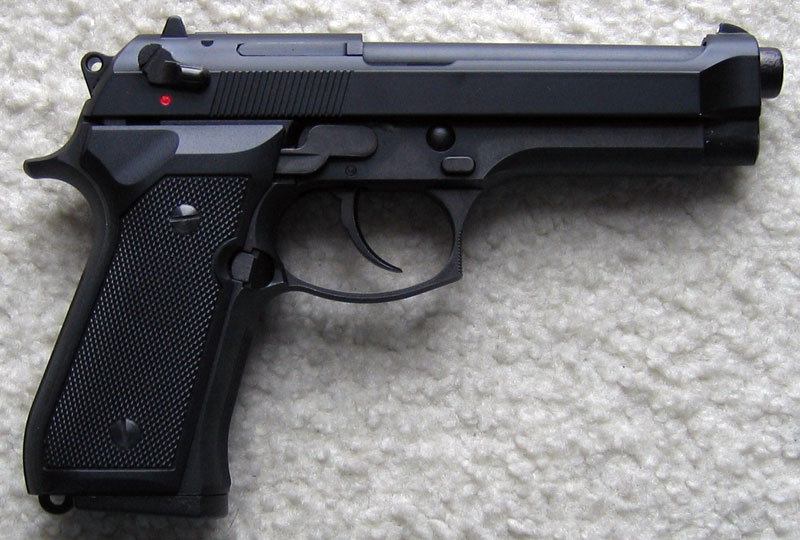
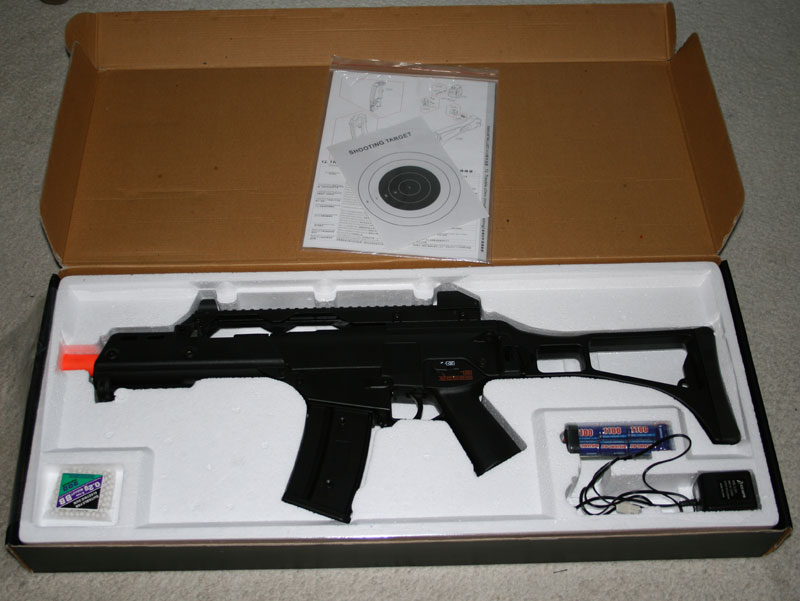
On Monday a friend came over with the JG G36C brand new in box. The packaging was not flashy, it simply displayed JG’s model number on the side with a bit of common knowledge information on the side. It was what’s inside that’s truly interesting.

G36C_1.jpgBattery_Charger.jpg

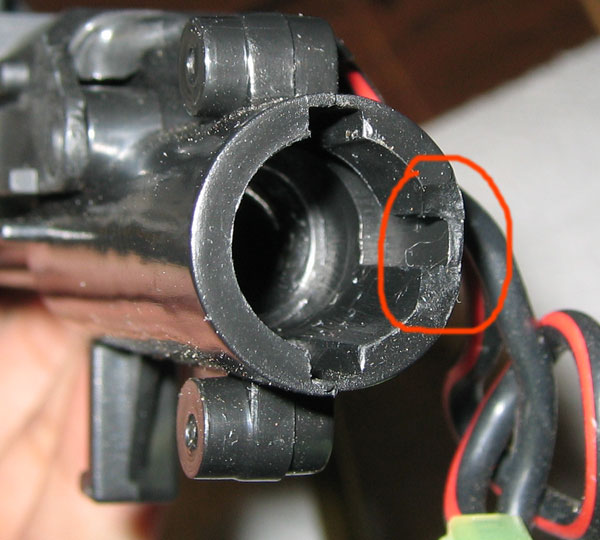
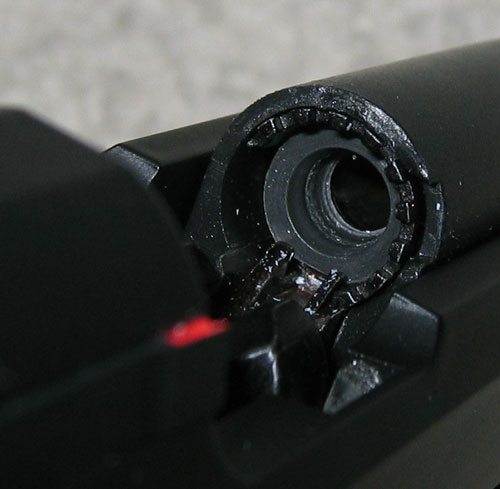
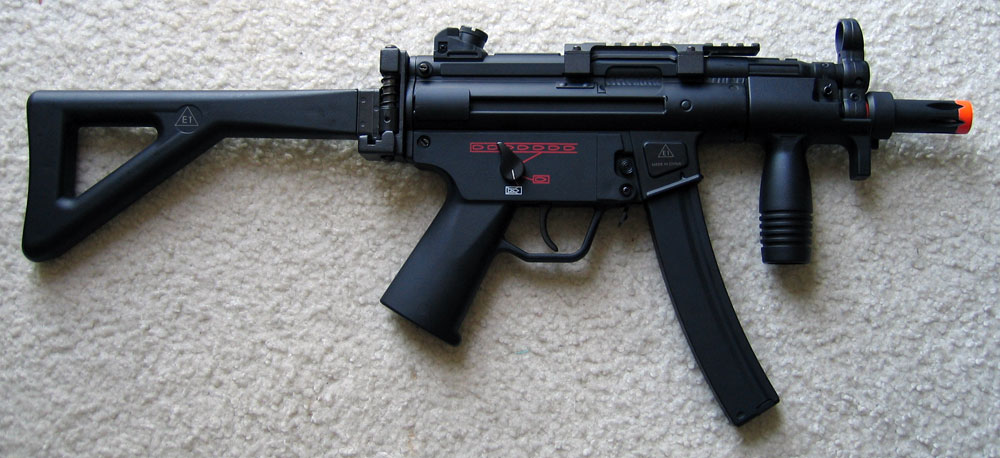
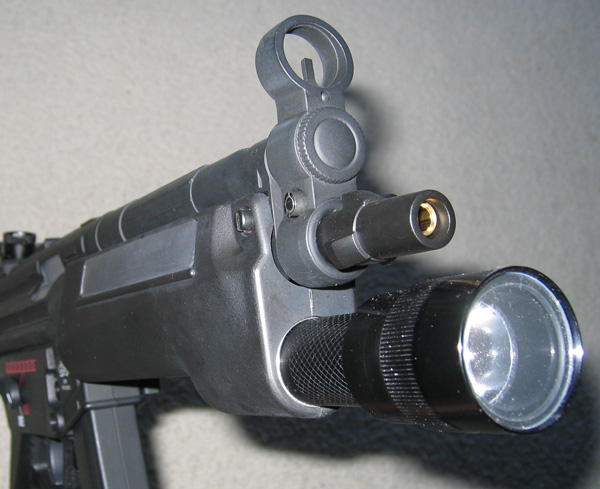
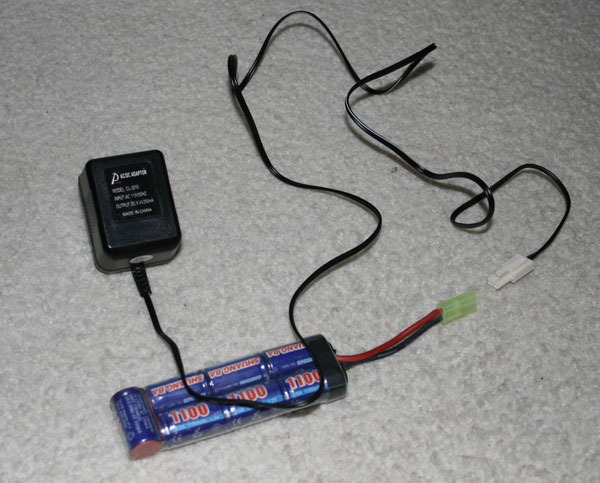
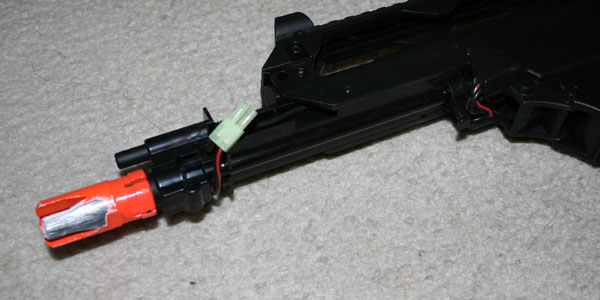
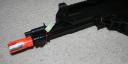
Aside from the G36C, the gun also comes with an 8.4V 1100 mAh NiMH battery, a wall charger, a pack of ~200 BB’s, the gun manual and a couple of shooting targets. JG includes a high capacity magazine with the gun so you’re pretty much ready to rock and roll right out of the package. Note because BuyAirsoft imports the guns from the US, the flash hider of the JG G36C is neon orange.

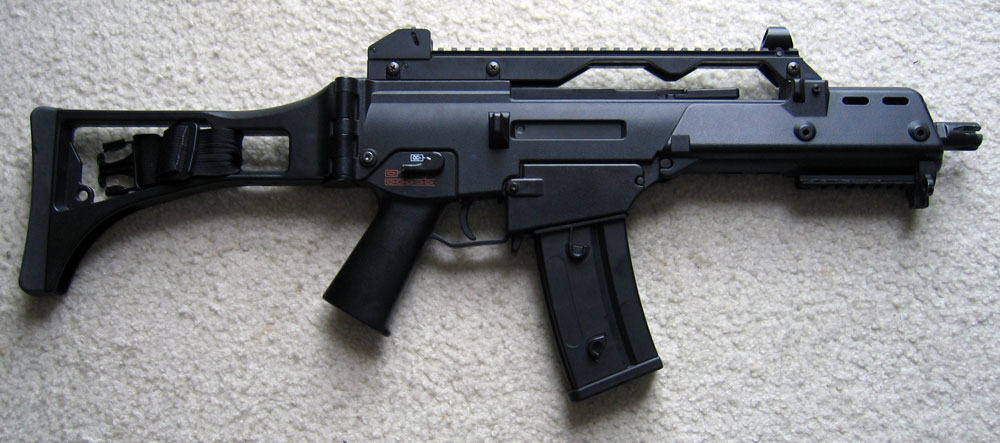
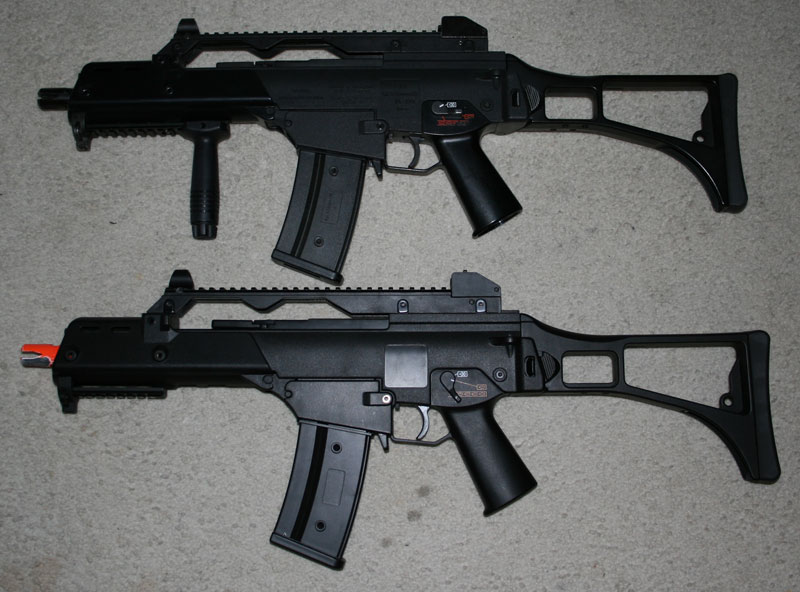
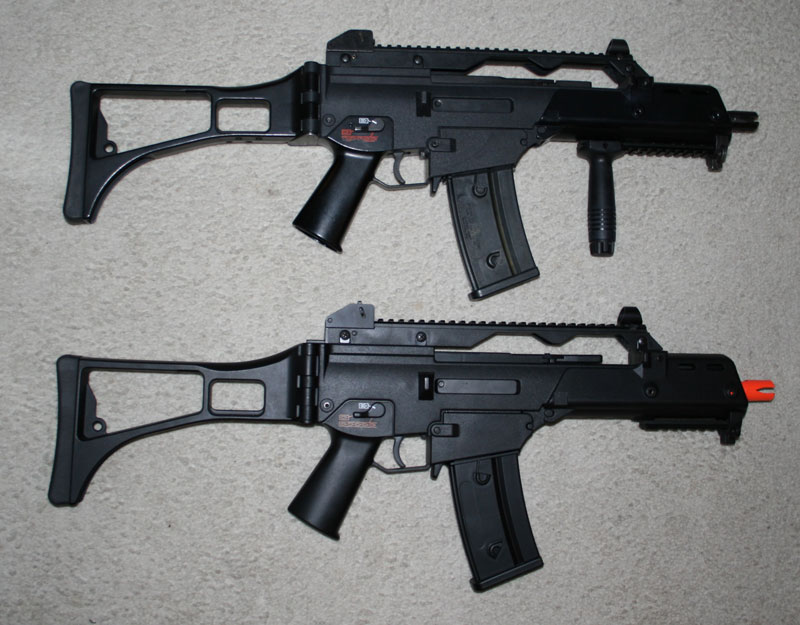
The gun weighs in at just under 3kg (6 lbs) with the battery installed and is about the same weight as my TM G36C and CA G36. In size and physical characteristics the gun is identical to my TM G36C and everything between the two was cross compatible (mag well, body, mags, flash hider, etc). The body has a slightly glossier look than the TM or CA however it feels as solid and there is no flexing or creaking anywhere.

G36Cs.jpgG36Cs2.jpg

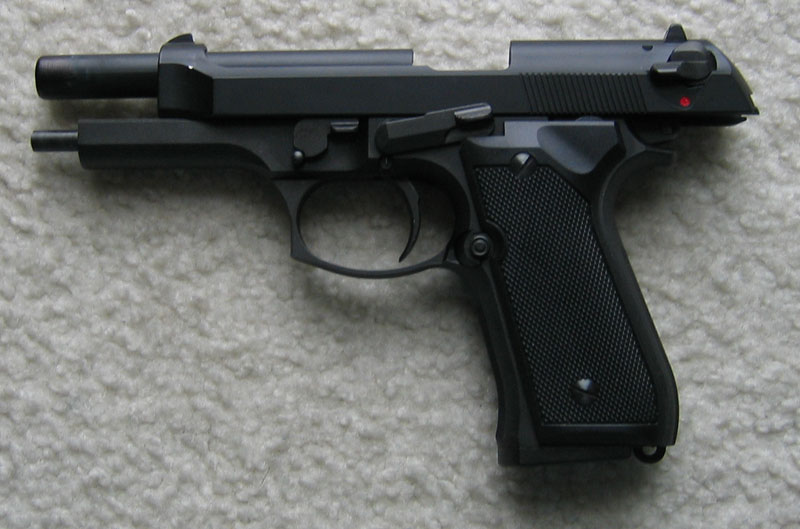
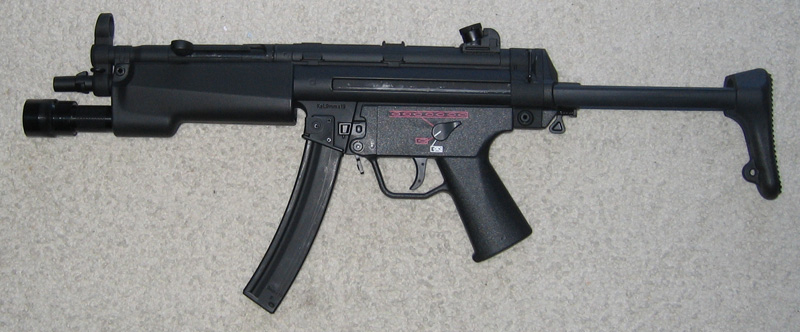
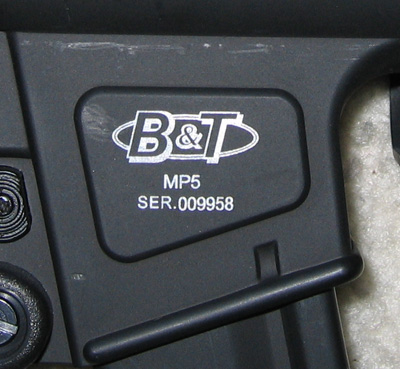
Noticeably missing on the JG G36C are any trademarks on both the gun and magazine. As you can see pretty much every part is physically identical to the TM, JG does claim that every part is cross compatible with the TM gun. My TM low cap, CA hi cap, MAG mid cap magazines were all compatible with the JG G36C.

G36C_2.jpgG36C_Wiring.jpg

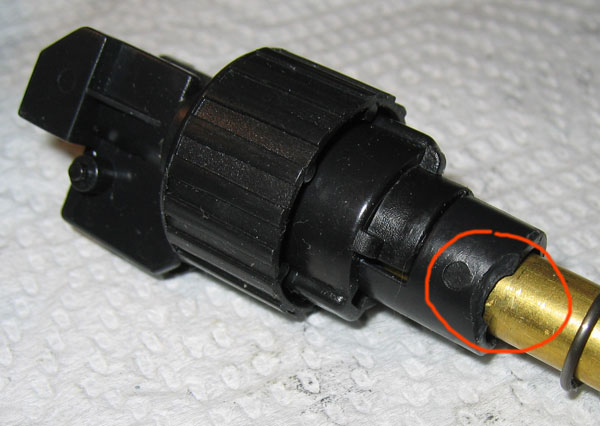
Like the TM and CA G36C’s, a mini battery can be installed into the foregrip . Connect the battery, put it into place via the guide clip and slide the foregrip over top. While waiting for the 8.4V 1100mAh battery to charge, I installed an 8.4V 1400mAh battery and wanted to give the JG G36C a few test shots. With my low caps filled with 0.2g BB’s I proceeded to test the gun. The first thing I noticed was that the JG G36C was extremely loud. It seemed to fire pretty straight so next up was to chrony the gun with my Guarder Speeder 2000.

After firing a few rounds I was pretty amazed to see the initial velocity readings however the large variance between shots was also worrying. BB’s checked in at between 350-370 fps, the muzzle velocity is certainly impressive however a 20 fps difference is much too high for comfort. I would later find the source of the problem and will get into that a bit later.

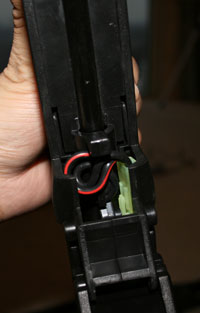
While test firing the JG G36C I did notice another problem which would turn out to be electrical. There would be approximately a 2 second delay between trigger pull and shots fired from the gun on semi, full auto sometimes would cut out after 5 shots. I was looking forward to opening the mechbox but now I also have a problem to trouble shoot.

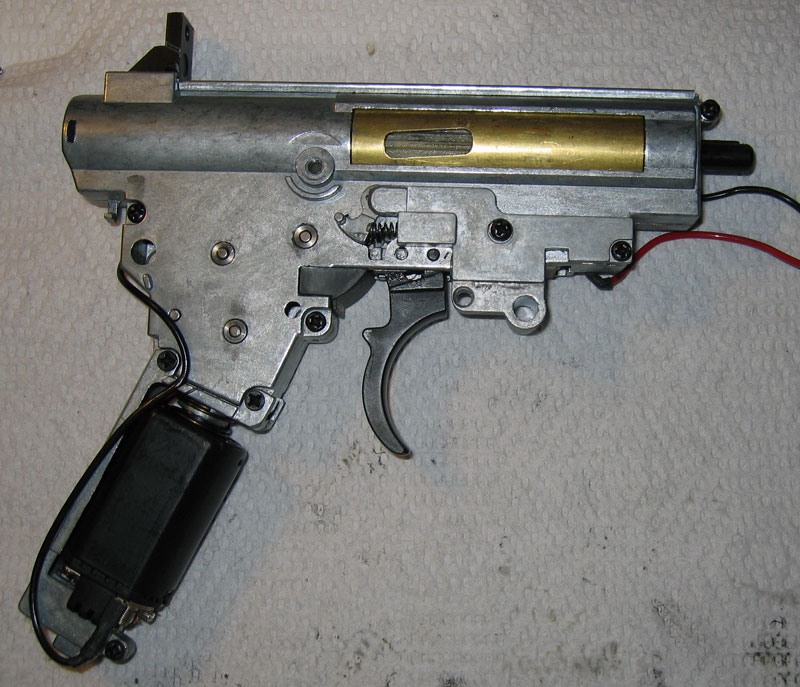
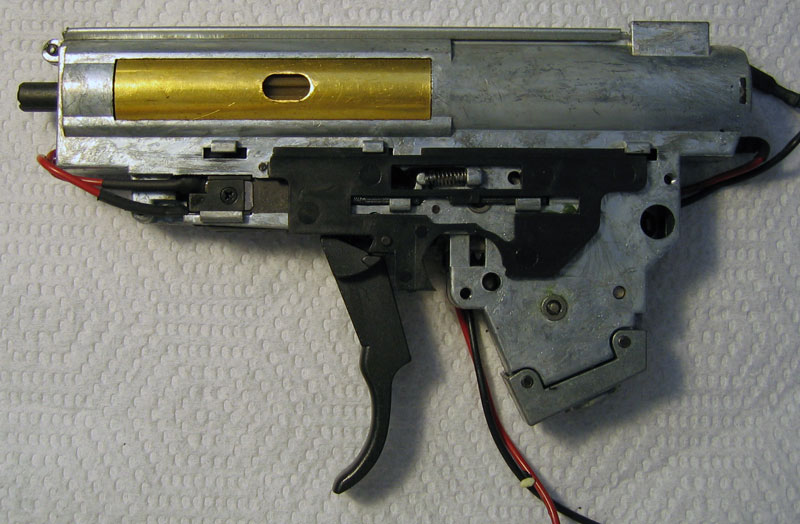
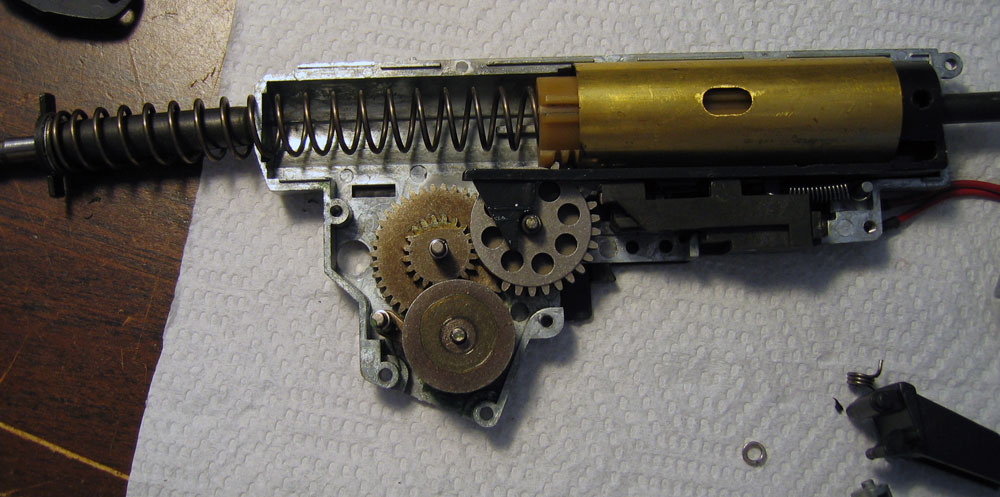
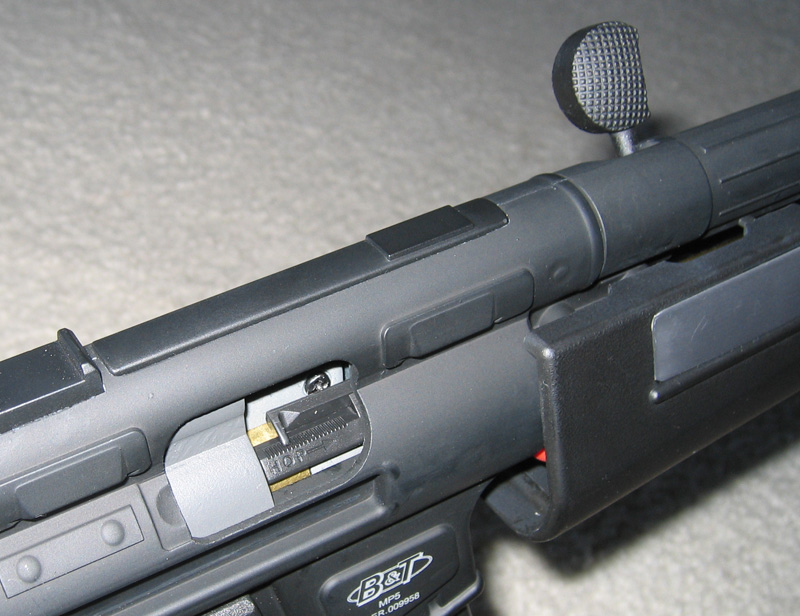
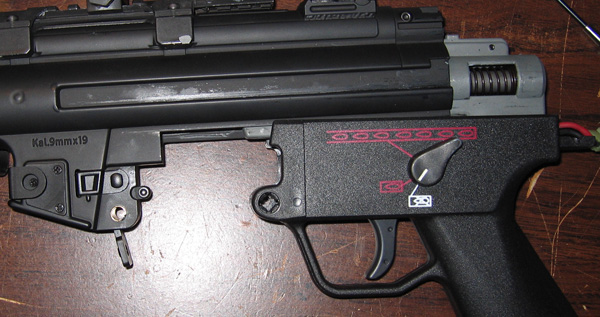
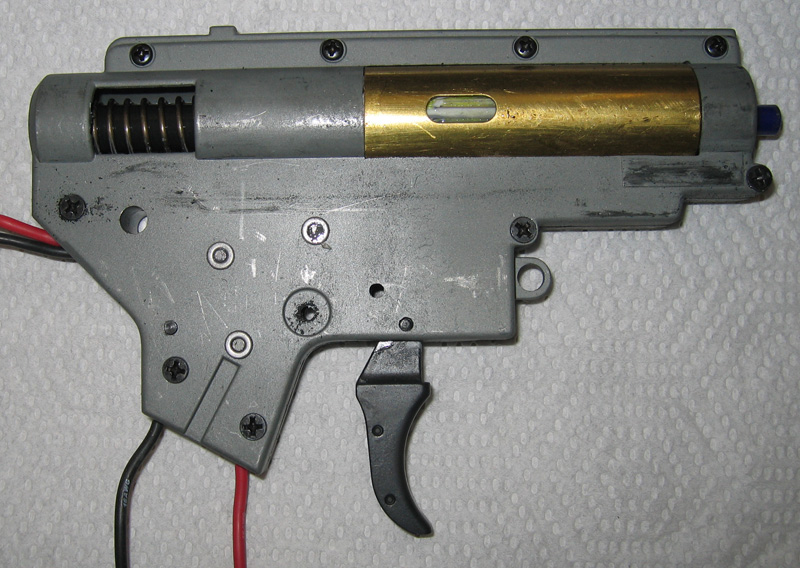
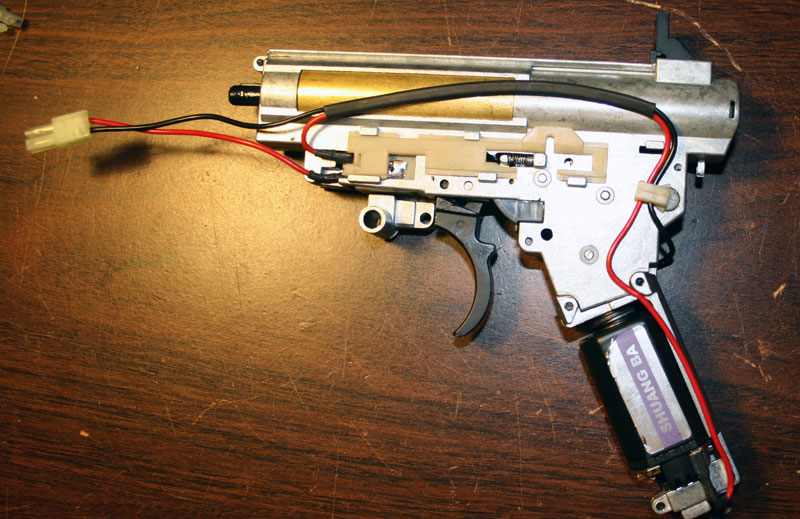
Stripping down the JG G36C is exactly the same as TM and CA, remove the magazine well pin, magazine well, rear pin behind the stock and then push the hopup forward and pull the mechbox out. After removing the mechbox from the pistol grip we’re greeted by this.

Mech1.jpgMech2.jpg

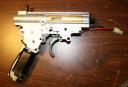
If you’re going to be working with the JG G36C mechbox becareful because there are a lot of sharp edges everywhere! After undoing all the screws and removing the stopper rail the mechbox was opened up.

Mech3.jpgCA.jpg

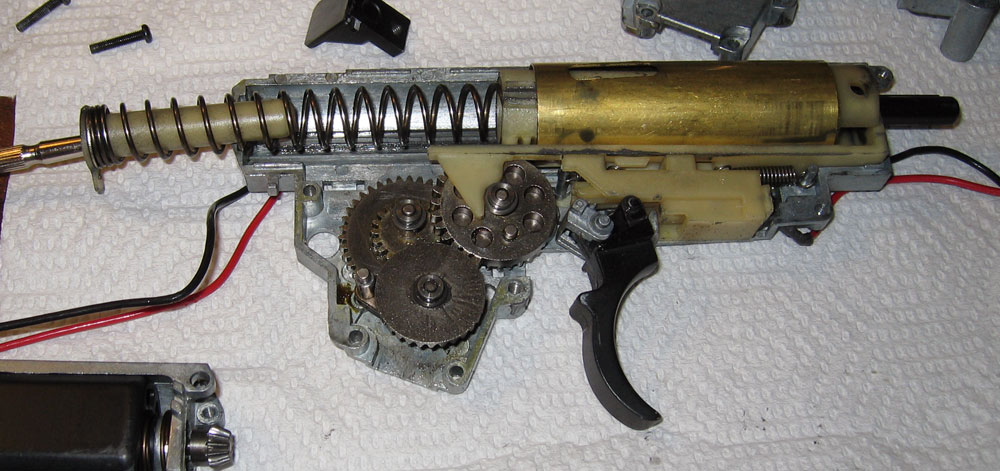
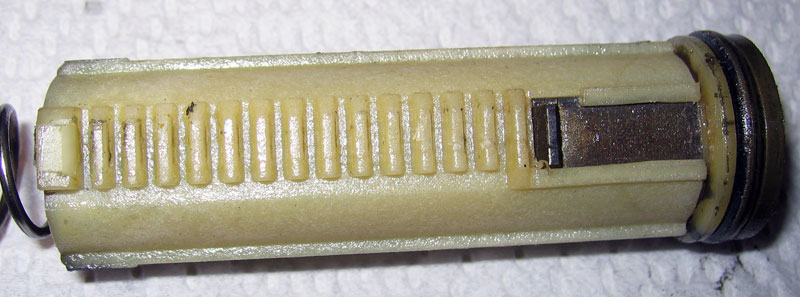
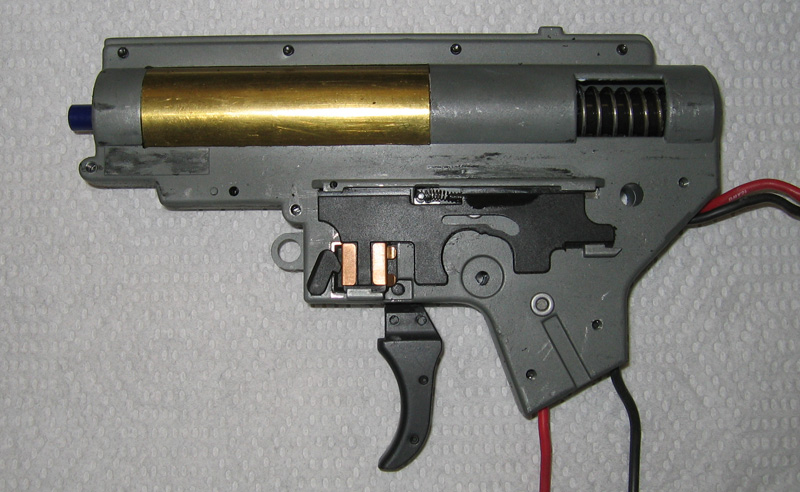
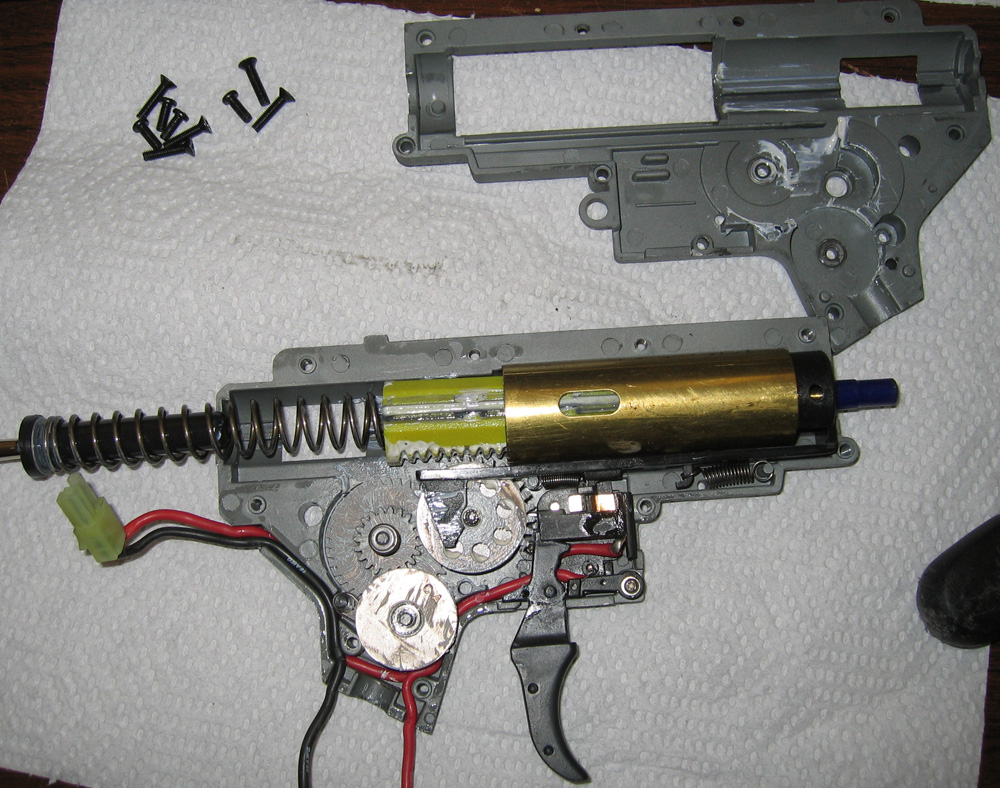
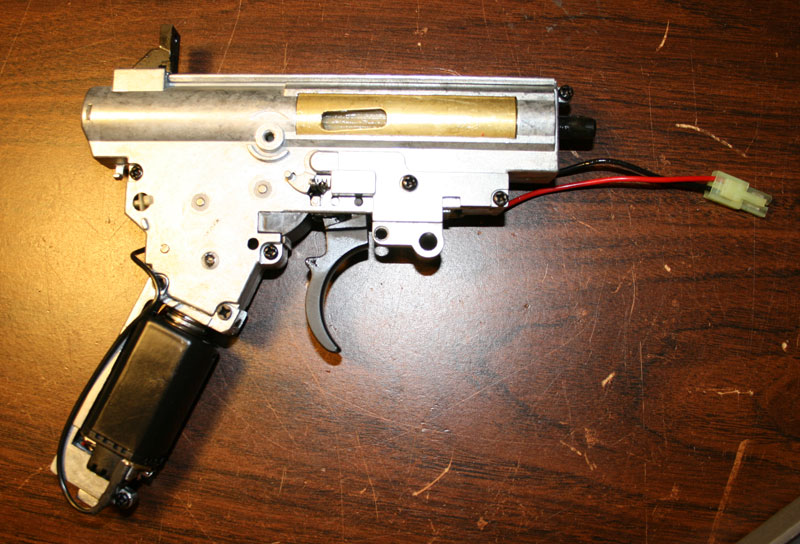
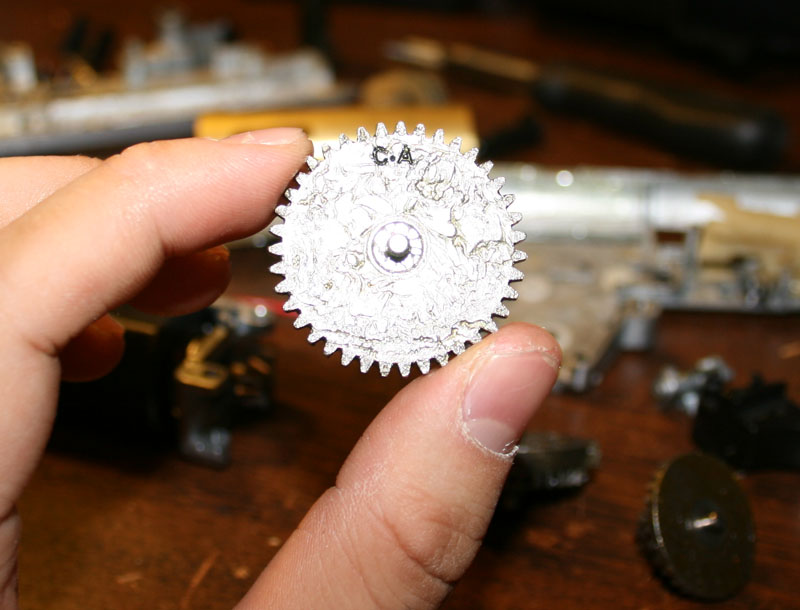
Here is a breakdown of all major components, JG uses plastic bushings (which was replaced with metal), plastic spring guide, plastic piston/piston head and CA gears. The piston head is ventilated for a better O ring seal however everything else is exactly the same as TM. There was a ton of grease everywhere with the majority inside the cylinder by the cylinder head and blowing into the inner barrel.

Spring_Guide.jpgMech4.jpgContacts.jpg

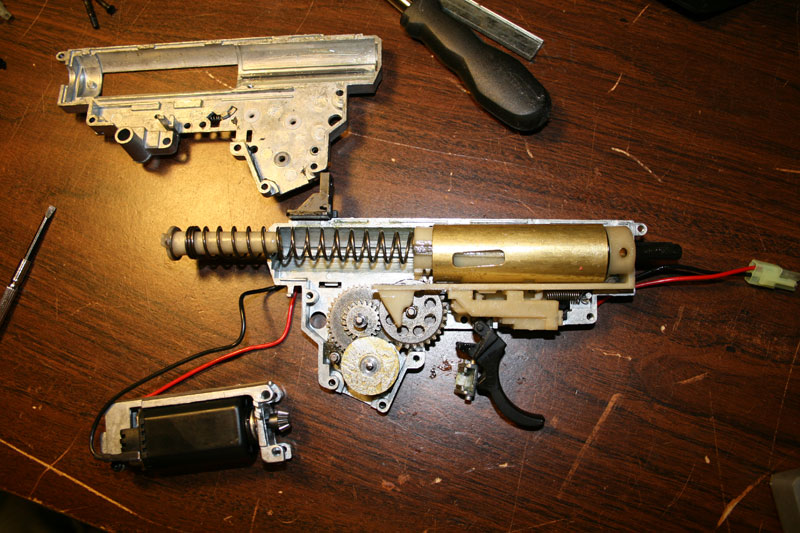
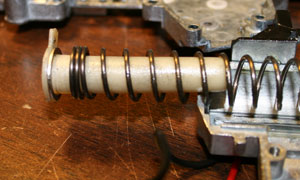
Here are a few other details I noticed while inside the mechbox. The plastic spring guide only had one peg, it was clear the other side had snapped off but I’m not sure whether I did that or whether it came like that. I was not able to find the other side even after I cleaned up my work bench. I tried to installed a Guarder ver 3 metal spring guide only to find out that the slits for the spring guide arms were not thoroughly cut. I had to chisel away at the holes and even then the fit was not as comfortable as I would have liked. It ended up to be a lot more work than I expected so I put the plastic spring guide back in and figure I would deal with this when the stock piece breaks.

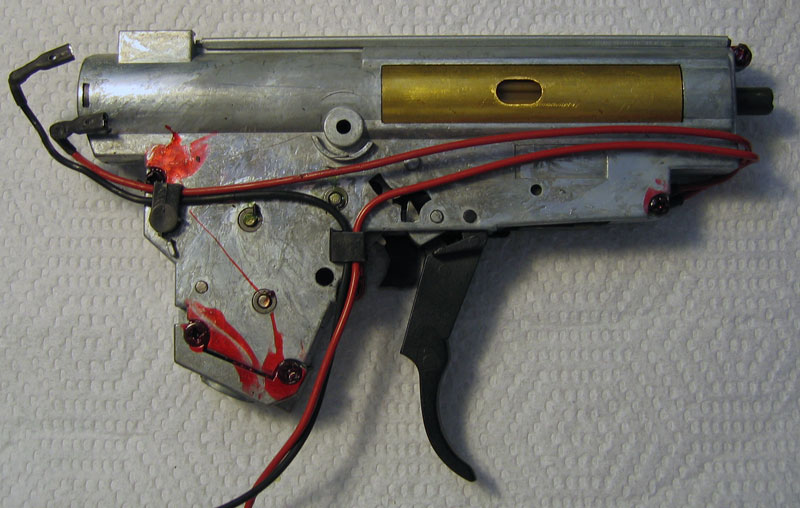
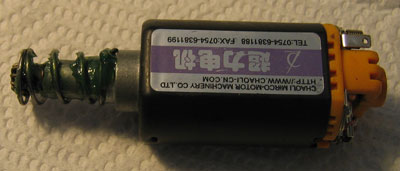
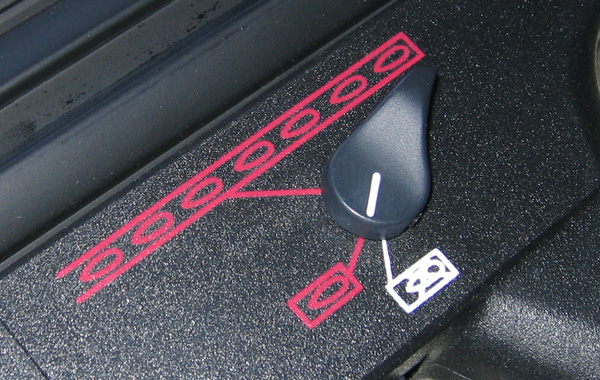
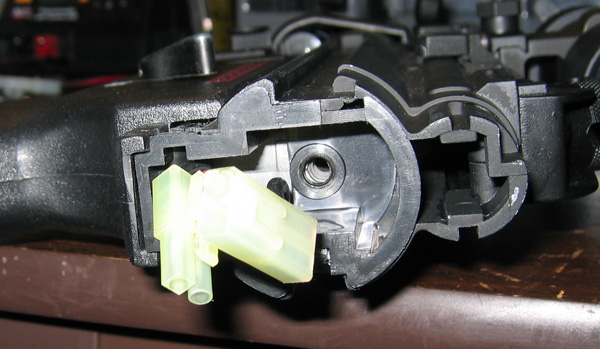
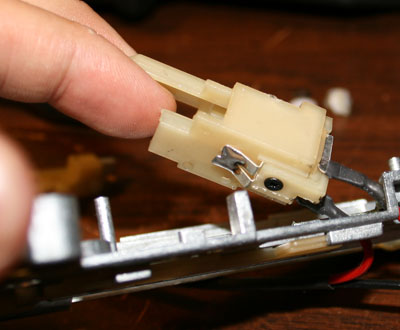
Next the mechbox contacts which are usually completed by the selector plate were soldered together. I don’t know why this was done but it works so I guess that’s all that matters.

The problem with the gun turned out to be with the Jing Gong G36C wiring assembly. There was poor contact with the positive wire which runs to the motor and I had to resolder that part. After that was done the JG G36C was as responsive as my TM G36C. 🙂 It did take about 5 hours of frustrating tweaking to locate the issue but I’m glad I did.

Putting the mecbox back into the body I did a bit more test firing, the trigger issue was gone however the muzzle velocity still varied by 20 fps. As I mentioned earlier, the piston was pushing a lot of the grease into the inner barrel and it needed to be cleaned out badly. After that was done muzzle velocity really tightened up and shots varied between 365-370 fps. 😀

The next big question with the Jing Gong G36C will be its reliability and that is something I cannot answer right now. It will be my friend’s main weapon for the season so I guess I’ll report if any issues arise.

After seeing and taking apart the JG G36C, it is a gun I would recommend to novice players. As a starter kit, it comes with everything you need although I’d probably get a better charger and more magazines when the finances allow. Just make sure you have a gunsmith handy though in case you run into problems like my friend did, yes it should work 100% right out of the box but for the price and what you get, it still seems worth the gamble. 🙂

Nov 26/07 Edit: I see through my referral traffic that many of you quoting the problems I experienced as fact for all JG G36Cs and that’s definitely not the case. I wanted to make it clear that the issues I had were with this gun only. I’ve seen a few more JG G36Cs and none had the electrical issue that affected this gun. Hope that clears a few things up, yes you can get a lemon which is difficult to fix but overall they seem to be pretty good. 🙂