KWA H&K HK45 GBB Review

I’ve always liked KSC/KWA’s H&K USP line of pistols, the feel and ergonomics are great however I hate the proprietary HK rail. Finding H&K compatible accessories is an absolute pain and the H&K rail to picatinny converter just looks stupid. When H&K announced the HK45 pistol, I knew it was only a matter of time before KSC/KWA came out with the airsoft version. 🙂

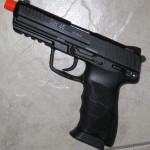
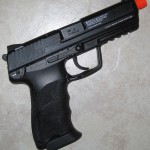
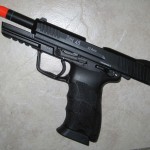
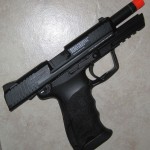
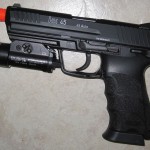
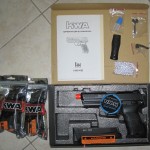
Anyway fast forward to today and woo I am the owner of a new KWA H&K HK45 airsoft pistol. It’s a full sized gun with a polymer lower, metal slide and plastic barrel. The retail kit also comes with the KWA HK45 manual, warranty card, KWA sticker, bottle of silicon oil, bag of 0.2g BBs, lock out key, hop up tool and another grip backstop.

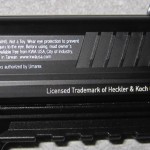
The HK45 uses the same NS2 gas system that powers all of KWA’s current generation pistols & GBBRs, though this gun is not officially a PTP (Professional Training Products) device. That’s ok with me though, I don’t like the ugly PTP markings anyway. 😉 There are the standard Umarex markings and warnings on the right side of the HK45. It doesn’t bother me but I know it would bother the purists. After picking up the pistol, you’ll notice that it has pretty good heft to it at 0.87kg, though about half is due to the magazine.

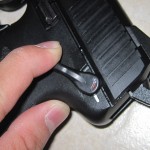
If you’ve handled a USP or MK23 pistol in the past, you’ll feel right at home with the KWA HK45. For those who are new to the platform, the biggest thing you’ll have to get use to is the magazine release. Unlike the typical button mag releases on the M9, Glock or 1911 platforms, the HK45 uses a lever system. Rock the lever towards the grip of the gun and the mag will slide right out. It’s not as fast as the button release (then again I probably just need more practice) but the big advantage is, you won’t accidentally engage it when the gun is holstered. I know I’ve lost some Glock and Hi Capa mags in the past using cheap holsters (not a problem if you use a platform specific holster like a Safariland).

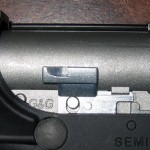
The KWA HK45 slide locks back after you’ve fired the last round from the magazine, slap a new mag in disengage the slide lock and you’re ready to rock and roll. Both the magazine catch and slide release are ambidextrous which is good news for lefties. On the left side of the gun’s manual safety/decocker but it’s only accessible when the pistol is held in the right hand.

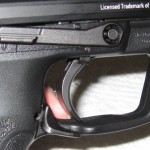
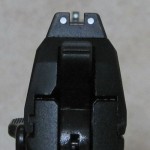
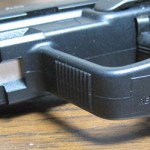
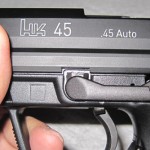
The hammer can be manually cocked into the rear position and reset with the decocker. The KWA HK45 has dot iron sights, line up the three dots and pull the trigger. As mentioned earlier the HK45 comes equipped with a standard 20mm picatinny rail which allows you to bolt pretty much anything you’d want onto the gun. With the USP or MK23s, you need custom accessories compatible with the proprietary rail. I was able to install my Streamlight TLR-1s on the HK45 with no issues. Under the picatinny rail, you’ll see the H&K markings along with faux serial number (I don’t know if they’re unique or the same on across each gun) and the standard H&K warning under the trigger guard.

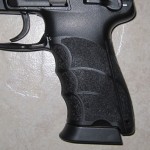
The pistol grip is grooved for your fingers and the pistol grip is textured to improve grip. There’s an extra base plate that comes with the KWA HK45 and the extra one I have is the same as the one installed on the gun. Not sure why you’d get two of the same but it’s possible my retailer mixed things up. Personally I did find the pistol grip a bit big by default (I have small hands) but it wasn’t too uncomfortable and it’s definitely not as large a MK23 or Desert Eagle pistol grip…

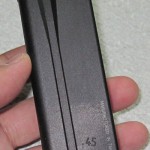
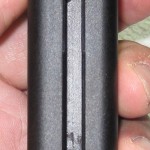
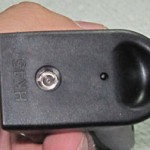
The HK45 mag is well… a magazine. As with all KSC/KWA pistols pull the follower down to the bottom and a button will activate which keeps it locked in place, allowing you to load BBs into the gun easily. Unfortunately the mag lips are reinforced so you won’t be able to use a speed loader’s GBB tool. On the baseplate there’s it says HK45 and there’s a hole for the fill valve. KWA fill valves are silent and do not indicate when full, a good 5-7 second gas charge should be sufficient.

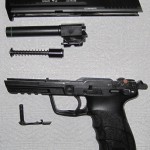
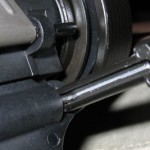
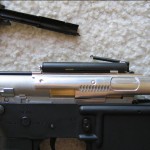
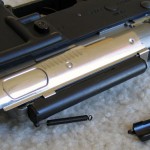
Taking the KWA HK45 apart is identical to its USP line of GBBs and very similar to 1911s. Align the slide’s notch with the slide release and pop it out by pushing on the rod on the right side of the gun. After that’s done pull the slide back then push forward and it should slide right off. Oh before doing the above though, remove the magazine first haha!

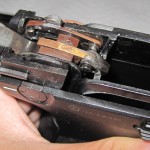
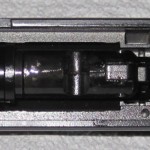
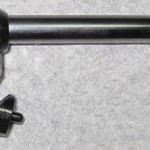
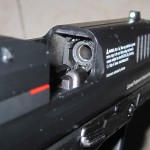
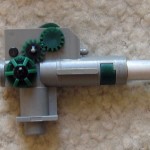
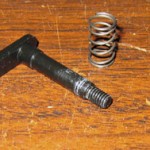
With the slide off you can take the outer/inner barrel and recoil spring guide out. Should you need to repair the trigger mechanism, you can take everything apart but for the purposes of this review I’m going to be lazy and leave it as is. I’m also going just show a picture of the blow back mech, I don’t really feel like taking it apart either. Note the KWA HK45 hop up is different from the USP line, new design which hopefully makes the HK45 more consistent than the regular KWA pistol.

To adjust the hop up with the KWA HK45 you’ll need to keep the hop up adjusting tool handy (it’s the same for all KSC/KWA pistols), counter clockwise is turning hop up, clockwise is turning hop down. With the HK45 I found that when the slide was in the locked position, the hop up unit was too far for me to adjust with the tool. Rather it was easiest to adjust the hop up with the slide 3/4 way back.

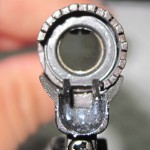
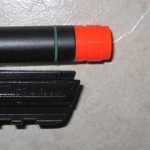
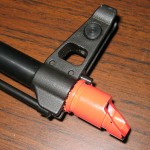
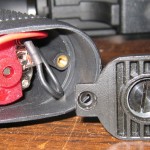
Silencers are cool for pictures but I don’t use them on the field so I removed the orange threaded tip from the black plastic outer barrel. Took all about 5 seconds with the pliers, after I just shaved off some of the orange bits of plastic left on the black outer barrel and gave it a quick once over with a sharpie so everything looks nice and clean.

Now to the fun stuff

Thought I’d never get through posting details about the gun but woo let’s get to the shooting! Like all NS2 KWA pistols, the blowback on the HK45 is excellent. Very crisp and quick, the gun feels great to shoot and it’s pretty darn loud! With 0.2g BBs the HK45 chronies in at 345 fps according to my Madbull chrony (I don’t trust this thing much frankly but I don’t have my old Guarder anymore) at around 24C. With 0.3g BBs the Madbull chrony is reading 340 fps or the same energy as 414 fps with 0.2g BBs! Remember GBB/Rs are variable energy weapons so play fair and adhere to the energy rules when you go to games. I’ll be buying another chrony soon and will retest the HK45 though to be fair fps readings I get are consistent with what I’ve seen other HK45s online and is similar to my old KWA M9 PTP (god can’t believe that review is almost 5 years old already).

The magazine holds 29 rounds and with a full gas charge I can get about 2 1/2 mags worth of BBs through the gun, that’s pretty efficient!

Oh I did notice one thing, buying HK45 specific holsters is quite difficult! There are not many on the market and I absolutely hate using generic or universal holsters. I read that USP holsters should work but haven’t been able to confirm it yet, I may just take the plunge and pick up a used Safariland 6004 USP holster anyway as they’re not too expensive on eBay. Probably won’t use it much as my secondary (the team runs TM 1911s there) but when I do use it, I’d like to use a good holster.
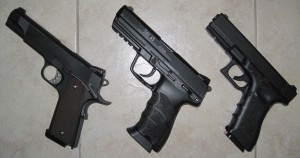

TM 1911 MEU, KWA HK45, TM Glock 18C

That’s it I guess, I will post updates when there are some. If you’re a Canadian you can order this gun from Revolution Airsoft for $195. I didn’t buy my gun through them but it’s a pretty good price none the less.
Classic Army M15A4 RIS Sportline Review

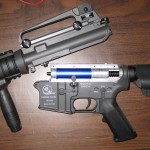
In my search for the perfect loaner rifle, I’ve gone through a number of AEGs already and the latest candidate for the job is the Classic Army M15A4 RIS Sportline.  The gun was purchased from Halifax Airsoft it should suit my needs to a T. New players all love the M4/M16 platform, the crane stock supports a large battery (more on that later) and it’s cheap enough that I won’t cry if it breaks.

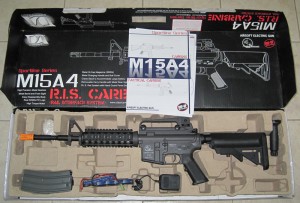
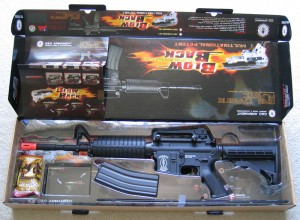
Classic Army’s Sportline series of guns are aimed at the entry level market and are suppose to compete with JG, DBoys and G&G’s Combat Machine brands just to name a few.  To compete the CA M15A4 RIS Sportline package comes with the gun (duh), a 300 round hi capacity magazine, two rail panels, foregrip, crane stock battery, a wall charger (throw this thing out, it’s a POS) and about 500 rounds of 0.2g BBs; which is pretty standard for entry level guns.

Probably to the first thing that airsofters will notice is that the CA M15A4 RIS Sportline comes equipped with a plastic body.  This was done to keep costs low enough to be competitive with the other Chinese manufacturers.  It feels pretty solid and there is no play between the upper and lower receiver but I wouldn’t want to fall on it.  Under the hood, you get a “standard” CA mechbox & components, its X series and previous Proline guns all come with a beefier upgraded mechbox and metal bodies (where applicable). The Classic Army M15A4 RIS Sportline weighs in at approximately 2 kg (4.4 lbs) which makes it pretty light compared to higher end guns but it’s on par with JG M4A1’s and G&G Combat Machine M4A1’s I’ve handled in the past.  According to my chrony the M15A4 RIS Sportline shoots ~345 fps with 0.2g BBs.

Now that we know the basics, here’s what I liked about the CA M15A4 RIS Sportline.  Moving to the back, I absolutely love the fact that CA equipped the gun with a large crane stock.  It might not be the same size as a real crane stock but the one that comes with the gun can support a large battery instead of a mini.  Note the battery that came with my gun is not the original, retailer must have swapped it out.

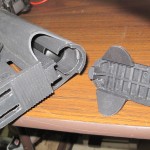
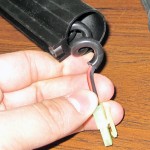
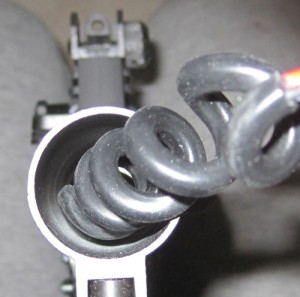
There is also a new end cap design for the CA crane stock, instead of taking the whole stock off when you want to charge or remove the battery, simply push in the two clips and the end cap pops right off.  That allows you to slide a battery in and out very easily, and allows you to have a battery installed and have the stock fully retracted, something that’s usually impossible with most AEGs with a crane stock.  Finally Classic Army uses corded wire (like telephone handset to receiver wire) in the buffer tube which when stretched and released, pulls the wire safely back into the buffer tube.  The problem is though that the wire is too thick but I’ll get to that in a few minutes.

I’m happy to report that the top rail of the Classic Army RIS lines up with the top of the receiver.  In the past that has been an issue and complaint amongst CA users.  The delta ring the M15A4 RIS Sportline is equipped with is nice and stiff, as stiff as the one on my PTW which means whatever handguard you decide to install will be secure.

Now onto the bad and there are some issues with the Classic Army M15A4 RIS Sportline.  My biggest gripes have to do with the front end of the gun.  I know the gun is aimed at the entry level market but I was still disappointed to see that CA equipped the thing with a two piece barrel.  JG, Echo 1 and G&G all use multi piece barrels for their entry level M4s but I was hoping for CA to do better.  The front sight is removeable (unlike with the G&G Combat Machine M4A1) but if you change the barrel you’ll want a new front sight anyway because the stock one is held in place by only a grub screw. Next it would have been nice if CA equipped its pistol grips with a brass insert for the screws so it doesn’t strip.

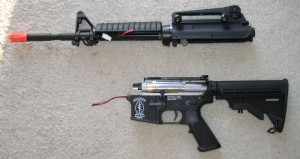
Stripping the CA M15A4 RIS Sportline down is exactly the same as with its X series of AEGs.  Pop out the front pin and slide the upper receiver off the mechbox.  Just make sure you have the magazine out of the mag well first. 😉  With the upper removed you can slide out the plastic hopup unit and 6.08mm aluminum inner barrel which is 363mm in length.

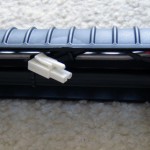
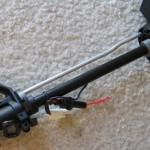
To remove the mechbox from the lower receiver, first you’ll have to remove the magazine catch, the mechbox pin, the rear pin, pistol grip and then buffer screw and that’s err where we ran into problems… yet again if you remember from my G&G Combat Machine review. This time the issue was with the wiring CA decided to use, it was simply too thick for me to get a screw driver back there to remove the buffer screw. I tried stretching the wire as far as it would go and I also tried putting the screwdriver down the middle. I guess when the gun gives me trouble, I’ll have to rewire the AEG as I’ll probably have to cut the wires to get the buffer tube off.

Luckily I’ve worked on two CA Sportline AEGs in the past so even though I didn’t get into this gun, I can still tell you about the internals.  The gears are said to be made of zinc alloy, whether it is or not I cannot confirm but they look and have a similar weight to stock TM gears.  I do not know what the mechbox shell is made of but it is not as soft as a stock TM mechbox.  It’s not as heavy as an upgraded CA mechbox so I guess the one that comes with the Sportline sits somewhere in the middle in terms of durability.  Yes I know that’s a very imprecise science but that’s all I got. 😉

It’s difficult to say how good the piston is, it looks and feels like well an AEG piston.  The piston head is ventilated and there is a plastic spring guide. Lastly the gun comes installed with plastic bushings.  I definitely would have preferred to see metal bushings as that would greatly increase the gun’s durability but at its designed power level, plastic bushings will do the job ok. There is one thing more I would like to say about the Classic Army internals, one thing tweakers will definitely appreciate is that when you open the mechbox everything (other than the spring and spring guide) stay in place.  I hate how the anti reverse latch or trigger pop out at first opportunity with the other Chinese manufacturers, that drives me up the wall!


CA M15A4 RIS Sportline shown with my Systema M4A1 PTW MAX

So there you have it the Classic Army CA M15A4 RIS Sportline is a decent rifle for the price (differs depending where you live) and it’s probably something that would appeal more to novice airsofters who are trying our wonderful hobby out.  Hardcore gamers looking for a primary might want to get something that’s full metal but if you’re like me and want a loaner, then this will do too.  Having said that I also would not have any problems using this rifle on the field should something happen to my PTW.

So I guess that’s it for now, when I do finally get the mechbox open of if there is a failure I will update this post but I plan to run this gun pretty much stock for as long as I can.  Let’s see how long it’ll last. 😉

Airsoft Innovations GasCan Review

While I have pondered getting a GBBR to use as my primary for mil sims (my MP7 is more an indoor weapon), one of the things that has been holding me back was figuring out how to carry gas; that is without carrying the damn propane tank. I fiddled with a VFC faux stun grenade gas charger I purchased a few years back (because I thought it was cool) but that thing is only good for ~2 GBB pistol mag refills. Using it with it and my teammates WETTI M4 GBBR mags, I don’t even get enough gas for one full mag of BBs, that and the charger is also awkward to carry on the field.

Airsoft Innovations had just released its GasCan compact refilling device and I think it may have solved the problem for us airsofters.

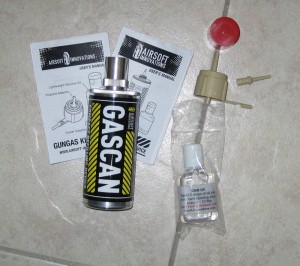
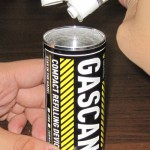
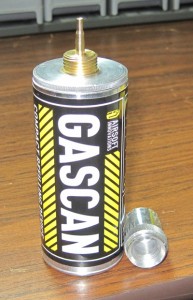
The AI GasCan is a literally just that, a small portable gas tank that you can bring to the field with you easily.  The package comes with a complete propane adapter kit (PP adapter, duster adapter, GBB silicon oil, manual), the GasCan device and of course the user’s manual.

The first thing you should check out is the user’s manual. Yeah I know the device is breeze to operate but if you’re new to airsoft, it’ll tell you everything you need to know.  The device is compatible with difuoroethane (HFC-152a), trifuoroethane (HFC 134a) and of course propane.

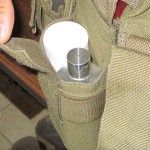
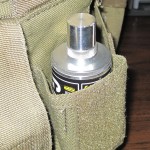
The device is 44 1/3mm in diameter and 130.6mm in height (up to the top of the cap) and according to AI, you can fit two GasCans into a single M4 pouch.  Unfortunately I have one device but I do have a bottle of Ibuprofen which is 45mm in diameter and what do you know it’s true! 🙂  It’s definitely a snug fit but it’s fairly easy to extract, pull on the cap which is screwed on and it’ll slide out. Myself I’d probably stick them in a smoke grenade pouch on my side or back, I only put primary magazines up front. 😉


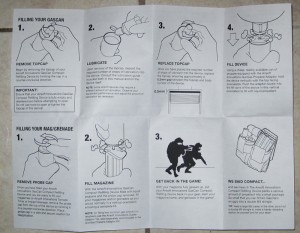
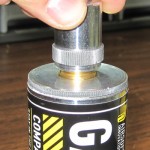
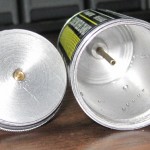
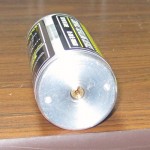
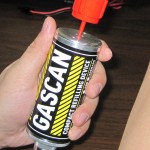
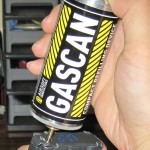
So here’s a quick breakdown on how to use open and use the charger.  At the top is the cap to that GasCan and removing it exposes the propane nozzle.  It’s made of brass like the earlier versions of the AI propane adapter so take care when filling your mags.  When the GasCan is empty you can unscrew the top of the device, that’ll expose the inside of the can and allows you to drop some oil into the device.  At the bottom is the GasCan fill port.  To use the device, you simply use it like a propane tank, flip it upside down and insert the tip into the GBB mag’s gas fill port.

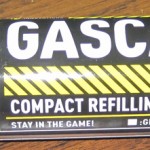
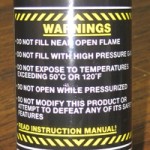
One of the biggest features of the device is, it allows you to oil your gas mags and the Tornado grenade without having to drop oil between the propane adapter and gas tank!  Simply put two drops of light silicon oil (included with the kit) into the GasCan or eight drops of heavy grenade silicon oil (included with your Tornado grenade) and charge it up with your gas propellant of choice.  Makes lubing your gun magazines and Tornado grenades much easier.  In case you forget, AI includes instructions on lubrication on the label.  Also handy, you can use a marker and check a box which indicates whether you have GBB or grenade oil in the GasCan.  Please be sure to check because grenade oil will mess up your GBB rifles and pistols!

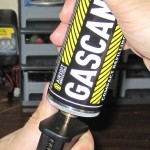
Alright enough talk by now I’m sure you’re wondering how it performs. 😉  I’m not sure if the GasCan is suppose to have an overfill indicator like with TM pistol mags, mine doesn’t seem to shoot propane out when it’s full so I gave the thing a good 10-15 second fill every time.  When the refilling device is full you can feel the liquid propane swoosh around. Testing the AI GasCan I am able to get 2 WETTI M4 mag refills or 4 KWA MP7 mag refills or finally 6 TM Hi Capa 4.3 mag fills per GASCAN charge.  That’s a huge improvement over my VFC gas charger which could only do 1-2 TM 4.3 mag fills.

If you’re a GBBR user the AI GasCan is definitely something you’ll want to check out as it makes humping gas so much easier than dragging around a bulky propane tank.  Leave that sucker at base and carry a few of these, that’ll allow you to do a “tactical” reload of gas on the field should you need it.

The Airsoft Innovations GasCan is a great little portable gas refilling device that GBB/R users will be interested in.  I know myself one of the bigger obstacles holding me back from purchasing a rifle GBBR is that I do not want to lug a tank of propane around with me (or can’t in some cases as some fields here do not allow that). $50 US is pretty reasonable price if you ask me, the various VFC gas charger is about the same in terms of cost and is only good for maybe 1 (2 if you’re lucky)  GBB pistol mags so the GasCan completely kicks its ass in terms of functionality (not to mention having oiled gas)!  It’s definitely the best portable gas filling device available on the market at the moment.

G&G AKMS Review

I recently acquired a “prototype” G&G AKMS and I have to say, I think I have finally found an AK variant AEG that I’ll keep.  Having played with more than a few AKs, nothing except maybe a teammate’s RS Type 56 or highly upgraded AKs have felt right or solid enough for me to game with.  I say that because it’s like a rite of passage for me to fall on all my rifles multiple times hence me wanting something that will not break. 😉

Package

Having previously owned a G&G RK47 (which was also a nice gun but not for me), I was definitely intrigued at the AKMS prototype’s offering.  Based on the real AKM-S (modernized AK47 with folding stock) the G&G AKMS definitely looks the part when comparing it to pictures of the real thing.

LeftRight

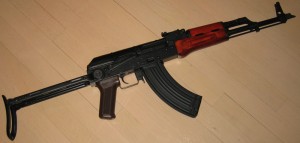
The G&G AKMS is rather plain looking (what I like), like other AKM style weapons and similar to AK47/74 though with subtle differences. The gun weighs in at ~3.5kg (7.5 lbs), externally is made entirely of steel with wood handgrips and a plastic pistol grip.  G&G AEGs normally comes with hi capacity magazines though the one that the AKMS came with this gun was malfunctioning so the retailer gave me a mid cap mag instead (which is fine by me, I hate hi caps).  Also included is a front sight adjustment too, ~500 BBs, a barrel cleaning rod and the user’s manual.  According to G&G, the AKMS comes with a 6.04mm diameter tightbore 455mm inner barrel but that is something I cannot verify.

BatterySelectorHopupBolt

The G&G AKMS is equipped with a folding stock so that means it uses a stick battery which goes under the top cover.  Space is tight so watch out for stray wires when putting the top cover back on. The controls are on the right side of the gun, the selector lever like all AKs goes from safe to auto then semi.  The lever is large enough to manipulate even with thick gloves on (something that is useful here in Canada during winter games) and the hopup adjustment is hidden behind the bolt door.  Because the battery is stored in the top above the receiver the fake bolt does not move all the way back like with G&G’s RK47.  Also missing is the entire long stroke piston assembly (that comes with the RK47) but that’s understandable since the battery is in the way.

Stock_LeftFront

On the left side of the gun, there is the stock lock button which when depressed allows you to fold or extend the stock.  There are also two sling loops, one near the gas block and one at the rear near the sling lock button. Notably missing is a rail on the left side for attaching Russian style optics.  Right behind the fore grip is a faux manufacture year and serial number.

Like all other AKs, the open iron sights are only adjustable for height but that’s not a huge deal for airsoft and at least for me using them is easier than with the peep iron sights on M4/M16s. The gun comes equipped with an AKM slant muzzle break; it is coloured orange so I guess this AEG came from the US but whatever that’s something that a quick spray of paint can fix.

Barrel_FrontBarrelGrip

Taking down the G&G AKMS is very different from the traditional TM design, whether it is better I don’t know but the gun certainly feels very good to hold and use.  To those interested in the internals sorry I am not going to tear it down just yet, the gun is shooting very smoothly so I see no need to go into the mechbox.  Not as much of a tweaker as I once was, perhaps I am getting lazy.

Gap

The G&G AKMS fires just like every other AEG, groupings seem good thanks to the 6.04mm tightbore inner barrel though I have yet to field the gun in an in game situation.  At the moment I have only tested the AKMS with TM and G&P mags and both brands function just fine in the rifle and other brands should work just fine as long as they are TM compatible.  The gun chronies in at ~425 fps with 0.2g BBs though I am not sure if the gun was tweaked by the retailer beforehand. One thing I did notice is the plastic err cap that covers the gears with version 3 mechboxes by the trigger was missing so dirt can get into the mechbox.  Will have to mcguyver  something to block that space in the mean time.

AKMS_800

First impressions from the G&G AKMS are pretty darn good and this is a rifle I think I will be keeping.  Time will tell how it stands up (interested in seeing it compared to the RS Type 56s on the team) to hard play and if there are any updates I will definitely post them. I am not a collector but I am told since this is a prototype model from G&G, there are only two in North America right now and that is kind of cool.  I certainly hope G&G goes ahead and releases its AKMS because this gun here is damn solid.

Streamlight TLR-1 Weapon Light Review

In low light operations having a flashlight is a must (that is if you don’t have night vision), used sparingly it’s a great tactical tool and nothing is more handy than a weapon light.  Attached to the gun the flashlight can almost be used as an aiming device (assuming the contact is not too far) and is always guaranteed to light up the area that the gun is pointed at.

For the last four odd years I’ve been using the Insight M3, which has served me well but I’ve wanted something that is LED based for many reasons (more efficient, last longer, does not generate heat, just to name a few).  When I decided to order a new pair of Magnum boots on LA Police Gear, I saw that it had a sale on the Streamlight TLR-1 so I decided to add it to my shopping list. 🙂

TLR1_PackageTLR1_Package2

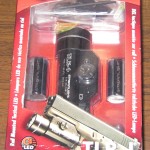
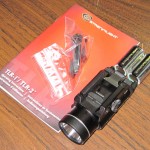
The Streamlight TRL-1 weapon light comes with two Streamlight CR123 batteries as well as a few different mounts (Glock, 1913, S&W 99, TSW and Berretta 92) and a basic instruction manual. According to Streamlight the TLR-1 puts out light in the 135 lumens range, while I do not have a device to measure this it is brighter than my old Insight M3.  The flashlight is constructed of aluminum, is waterproof and the LED is rated for 50,000 hours. Run time according to Streamlight is 2 1/2  hours of continuous output.

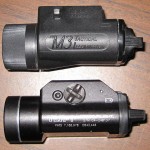
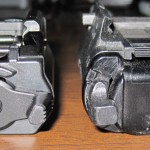
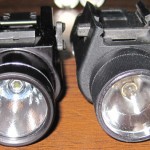
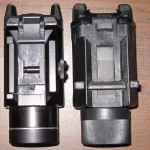
Now that the “specs” are out of the way the Streamlight TLR-1 is roughly the same size as Insight M3 though it’s slightly heavier (the M3 is plastic).

TLR1_M3SideTLR1_M3RearTLR1_M3FrontTLR1_M31

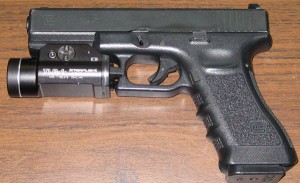
Mounting the light is different from the Insight M3 (more on that in a sec) but the controls are in the same spot and function in the same manner. To mount the light onto a pistol or picatinny rail is a bit different from other weapon lights.  Instead of sliding along the rail, move the TLR-1 into position, press the twist/secure button and the light clamps in place.  Tighten the screw (hand tight is enough) and the TLR-1 is nice and secure on your gun rail. Dimensions of the flashlights are about the same and with the TLR-1 installed on the TM Glock 17, I do not have any problems inserting the combination into my Safariland 6004 Glock w/M3 thigh holster.

TLR1_BatteryTLR1_Battery2

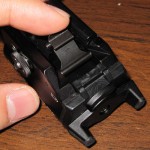
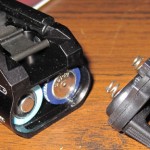
At the rear there’s a clip which secures the err rear switch mechanism (don’t know what it’s called) and it’s pretty darn tight.  The first few times you’ll definitely need to use a tool (a coin works quite well) to snap it out of place but once it breaks in, you should be able to do it with just your fingers.  When the battery compartment is open, insert your batteries then close things up.

TLR1_Glock

With the Streamlight TLR-1 locked in place on your weapon, you certainly have a something that’s ready to rock in low light conditions.  The 135 lumens rating is high enough to blind opponents in a CQB environment and the LED bulb means you’ll have something that can run for a long time without killing the batteries, burn out or generate a ton of heat (yeah I’m guilty of accidentally leaving activating the my weapon light while in my kit bag).

The Streamlight TLR-1 is still new to me and time will tell if it serves me as well as my old Insight M3.  The manufacturing quality seems top notch and Streamlight has a good reputation, I have little doubts that my search for a LED based pistol weapon light is over.

Double Eagle M56A Shotgun Review

In airsoft, shotguns are definitely underrated and like their real steel counterparts airsoft shotguns truly come into their own in CQB situations (single BB shotguns are not true shotguns). Double Eagle has released a copy of TM’s Super 90 M3 springer shotgun with its M56A. A hybrid cross between the M3 Super 90 and M3 Shorty, the DE M56A has the shorter outer barrel and a full stock.

DE_BoxDE_Package

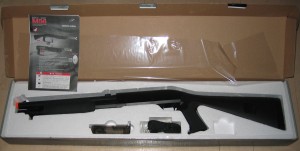
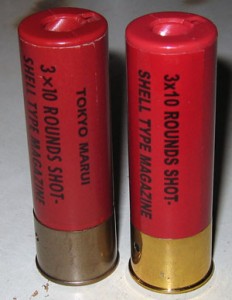
The Double Eagle M56A comes with one 30 round shell (mine came with one, I think it’s suppose to come with two), a 100 round “pistol mag” BB loader, a sling and a small bag of 6mm BBs. Since the gun is a copy of the TM system, the M56A fires three BBs at a time so each shell gives you ten shots.

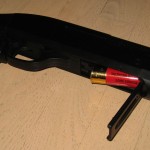
DE_Shell

TM and DE shells have the same physical dimensions and are cross compatible between the two platforms. Accessing the magazine area, there is a lever on the right side of the trigger which when pulled opens up the shell door and ejects the 30 round shell. One of the first things to break with TM shotguns is the shell door hinge and there’s no doubt the M56A will suffer from the same design problem.

DE_Side2DE_Side1DE_Sights

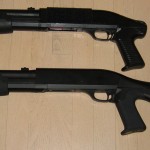
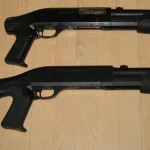
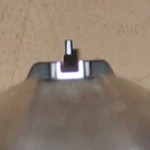
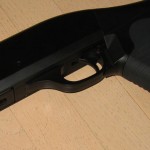
As you can see besides the stock the DE M56A is the same size as the TM M3 Shorty (Smokey’s rear grip installed on the TM) and everything is placed in the same position. The M56A is slightly lighter than the TM M3 as externally the gun is completely plastic while the TM has a metal outer barrel, shell door and sights. On that note the M56A’s sights have been painted white which makes acquiring targets easier than with TM’s black sights.

DE_SafetyDE_Load

I’ve been playing for years with the TM M3 Shorty, using the DE M56A is very familiar though I feel the stock is too long for someone my size (I’m 175cm or 5’8” in height) and teammates who are similar in size to me agree that the Super 90 stock is too long. The M56A uses a button safety which is great if you’re right handed however if you’re a southpaw you may have difficulty manipulating the switch.

DE_Front

Since the gun fires multiple BBs in a single shot, chronying the M56A is difficult but when one BB is loaded the gun comes in at 280 fps with 0.2g BBs, which is slightly higher (250 fps) than my 4 year old TM M3 shorty but then again, spring in the M56A is brand new and will settle after some use. The gun has a fixed hopup, I hear it’s set for 0.2g BBs but I find the flight path is better with 0.25g BBs.

Effective range of the DE M56A is less than a stock TM AEG but that’s alright it’s a shotgun after all. In CQB I would feel comfortable engaging targets as far as 20-25 meters, after that I have to fire the gun as a mortar. 😉 Compared to a rifle or pistol the ROF is much lower so that’s something the player has to adjust to but BB spread at 4 meters is ~ 10 cm which definitely helps make up for the low ROF. The feeling of getting a two’fer with one shot is pretty good.

In terms of a clone the DE M56A is pretty close to the TM M3 Shorty, the stock is a bit long for my liking but others might not mind. For CQB the DE M56A is a decent primary weapon once you adjust for the lower ROF. I have a TM M3 Shorty already so this is not something I would get but for the cost (even in Canada) the DE M56A is inexpensive. Shotguns are a lot of fun to use but it’s definitely a third or fourth weapon in line. If you’re new to airsoft get a decent AEG and pistol first but if you’re a veteran and want a challenge, shotguns are fun!

Combat Machine M4A1 Review, kind of

Anyway it has been a couple of weeks since I picked up the Combat Machine M4A1 (G&G’s entry level brand) and decided to take it apart today, or at least I did as much as I could but more on that later.  Let’s recap what comes with the gun…

cm_package1

The Combat Machine M4A1 comes with a 450 round high capacity magazine, ~1000 rounds of 0.2g BBs and a cleaning rod.  The M4A1 is pretty plain with a standard M4 heat shield handgrip, detachable plastic carry handle and a six position LE stock. As the box indicates the CM M4A1 also supports G&G’s new pneumatic blow back mechanism which gives the gun a bit of novelty, even if the feature doesn’t really do anything. Out of the box, the gun chronies at 320 fps with 0.2g BBs according to my Guarder Speeder 2000.

cm_inhandguardcm_ejectioncm_3piece

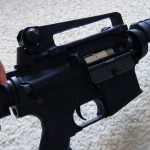
As with all regular M4A1 AEGs the battery goes into the handgrip and to keep the cables in place and tidy, G&G zip ties the battery cable to the outer barrel. To access the hopup, pull on the charging handle and the dust cover will flop open.  That will also pull the fake bolt back which allows you adjust hopup dial. Combat Machine is G&G’s entry level brand and as you can see from the third picture the gun comes with a three piece outer barrel. That was a bit disappointing, I guess eventually this gun will suffer from the dreaded barrel wobble problem. Also note the front section of the outer barrel is made from a single piece of cast metal so you’ll need to get a new front sight if you want to install a single piece barrel.

cm_apart

Removing the upper receiver of the Combat Machine M4A1 is the same as with Classic Army, G&P and of course G&G M4s. The Combat Machine M4A1 uses a hybrid version 2/3 mechbox and cracking this shell will be difficult.  It has a lot of  metal up front where the cylinder head is and is not affected by the design flaw that affects Version 2 mechbox shells.

cm_pincm_hopupcm_forward

The front pin is hinged which is a nice feature, now you don’t have to worry about losing that pin.  The hopup unit is one piece and made of plastic.  The barrel is made from aluminum and from what I’m told it’s standard bore (6.08mm). Another neat feature with the Combat Machine M4A1 is when you press the forward assist button, it releases the anti reverse latch which allows the spring to fully decompress.
cm_blowback1cm_blowback2

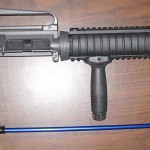
Here’s a close up of the blow back mechanism from the outside anyway, I wasn’t able to get into the mechbox so I’m not sure how it works internally.  I am told from a friend who was able to take apart his gun that there’s a hole at the top of the mechbox and which diverts some of the compressed air from the cylinder into the black tube which pushes a piston attached to the fake bolt.

I’ll admit that it’s certainly neat but it wears off quickly. When the gun is empty the bolt only moves back a couple of centimeters but when loaded the bolt moves as far as the above picture shows when I pull the charnging handle back. You can’t lock the fake bolt back with the Combat Machine M4A1 but I believe you can with the G&G and Top Tech M4s with support this feature.

cm_bottomcm_magcm_motor

After seeing G&G cut corners with the Combat Machine M4A1, I was pleasently surprised to see the pistol grip has brass inserts for the motor plate screws, that means it’ll never strip. The mag catch comes apart like with a real M4 and the motor is the standard long type.

cm_buffercm_bufferscrew

The reason I was not able to get into the mechbox is because for some reason there’s a piece of plastic in the groves of the buffer screw.  My screwdriver just can’t grab it. 🙁  Very disappointing, if I figure out a way to remove the plastic I’ll rip the mechbox out and snap some pictures.
cmside1

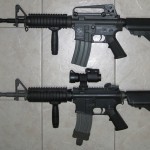
The Combat Machine M4A1 feels pretty solid and if I were a novice entering the hobby I’d have no qualms using a weapon like this.  As a loaner I feel comfortable that I’ll be lending friends something reliable and if it breaks it’s not that big a deal since it was cheap. 😉  At the end of the season (or when something pops up) I’ll post an update on how the gun performs.
EOTech 552 Replica Review

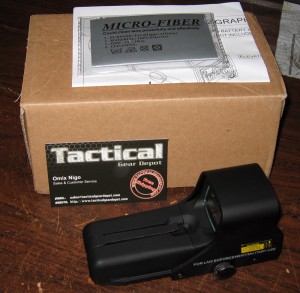
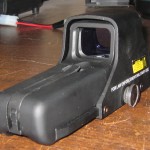
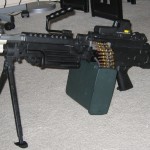
A week and a  half ago I ordered an EOTech 552 replica from Tactical Gear Depot (which at the time was on sale for $54 shipped) and it arrived today.  Initially I was going to put it on the Echo1 SAL but decided it would be better suited on the M249 Para since using the iron sights are near impossible with a goggles on. That and it looks a lot cooler on the M249. 😀
eotech_package

The EOTech 552 Replica comes with an instruction poster, a micro cleaning lens cloth and two AA batteries.  The replica will mount on any 20mm picatinny rail but make sure you have enough space because the sight is quite long.

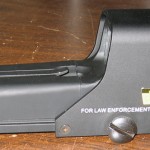
eotech_lefteotech_right

Here are some left/right pictures of the EOTech 552 replica and it looks pretty close to the real thing. The RDS reticle is adjustable well to a point, the windage settings are pretty good and you should be able to sight your gun well left and right.  Height options are a lot more limited and if the replica sits high up on the weapon you may have difficulty getting the reticle low enough.

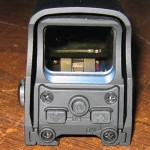
eotech_fronteotech_back

The front lens of the EOTech replica is very shiny, almost like a mirror and the glass on the back is also very glossy.  The rear lens is also tinted brown, in low light you may have difficulty seeing through the optic (yes I know that sounds ridiculous but that’s how mine is).

On the rear pressing up or down activates the EOTech replica and it will remain on for two hours before automatically shutting off.  There are 20 brightness level settings and pressing up and down will allow the optical sight to scroll through the various settings.  Pressing the circule NV button on the back changes the reticle from red to green (and vice versa), when the red reticle is selected there’s slight ghosting even at the dimmest setting.  There is no problem when the RDS is set to green.

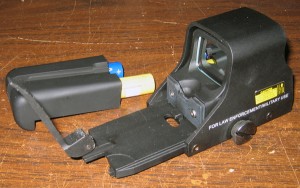
eotech_batt

To insert/change the battery, lift up the lever at the front and slide the battery compartment out.  Insert ths two AA batteries, reinstall and you’re set.

eotech_ptweotech_m249

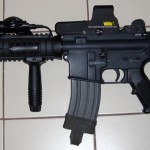
As mentioned earlier the EOTech 552 replica fits just fine on 20mm picatinny rails and there were no problems putting the optic on both my PTW and M249.  I’ve read quite a few instances where the rear window cracks (an issue that seems to plague many different replica EOTech sights) after a bit of use, I guess we’ll have to see if it happens to me too. Still if it does it’s only $54 US so that’s not the end of the world.

I guess that’s it for now and as usual when there are updates, I will post them. 🙂

May 18, 2009 edit: I forgot to update this post but I have since sold the EOTech 552 replica because I found it doesn’t suit my needs.  Height was not adjustable enough to use with the M249 and I find it’s easier to sight things with my aimpoint on the PTW.

As an accessory for looks the EOTech 552 replica is great but in terms of usefulness on the field, it’s just not there for me.

Echo1 Stand Alone Launcher (SAL) Review

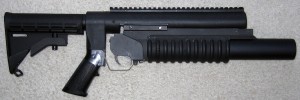
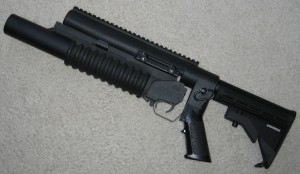
Yesterday I picked up a new toy, an Echo1 SAL (Stand Alone Launcher) and it’s pretty damn cool!  It’s a force multiplier type weapon and can fire a single 40mm airsoft grenade round. The complete package weighs in at ~ 1 kg and is  The Echo1 SAL looks like a rough copy of the GB Tech M203 Masterkey Standalone Buttstock Module.

sal1sal2

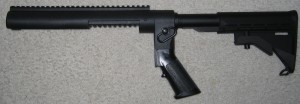
As you can see there are two components to the Echo1 SAL, a RIS mounted M203 grenade launcher and the frame itself. The SAL frame is made entirely of plastic (Echo1 says it’s high density polymer whatever that really means) as is the frame of the M203 RIS grenade launcher but the barrel assembly is metal. There’s a 20mm rail on the top for mounting optics or the M203 leaf sight.

salgrenadesal5

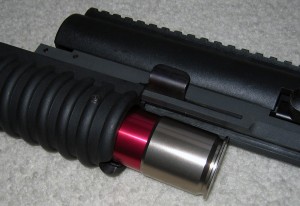
The Echo1 SAL function like a regular M203 grenade launcher; you pull the trigger, the shell fires and then it needs to be replaced. The M203 should work with all 40mm grenades on the market though I’ve only tested them with CA 165 round and Madbull XM108HP grenades and they work flawlessly.

If you want to remove the M203 grenade launcher and mount it on another weapon that’s a breeze, undo the two RIS knobs and viola it’s off and free to mount on any railed weapon.

salnom203sal_under

If you do not like Echo1 M203 grenade launchers (like if you want something with a metal frame and real weight for instance), the 20mm rail on the inside can accommodate any M203 as long as it’s rail mounted. I don’t think the Madbull XM203 series are compatible with the Echo1 SAL frame but I do not have one to test with.

salstock

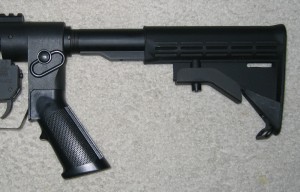
On the rear there is a M4 “LE style” collapsible butt stock which makes aiming a breeze. The stock and buffer tube can be removed (like how you do with a regular airsoft M4A1) and the Echo1 SAL can be wielded like a pistol but I personally like the feel of a stock. 😉

Overall the look and feel of the Echo1 SAL is pretty good though I did not like the sharp edges around the pistol grip area…

salgrip

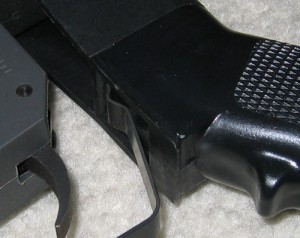
The edges are quite sharp and can be uncomfortable to hold if you’re drawing the weapon quickly, I certainly hope Echo1 rounds and smooths this part out in future models. Next I would have liked to see side rails (for a quadrant sight perhaps) and a sling mount near the front so you can use a 2/3 point sling.  A single point sling will leave the weapon dangling which can make things a bit awkward when you’re trying to move around.

sal

I have yet to battle test the Echo1 SAL but having used other grenade launchers in games I can’t wait to use this in a CQB situation. It feels pretty darn good and as usual when there are updates I will pass them along. 🙂

AI Tornado Distraction Device kit review

The AI Tornado is easily the most effect grenade on the market and it’ll clear a fair sized room of bad guys quite easily, but there are some cases where a frag grenade is not appropriate. If there are hostages or sensitive equipment which need to be retrieved, the attacking squad has no choice but to pile into the room as fast as possible to overwhelm the enemy. What is needed is a flashbang type device which unfortunately does not exist, at least for airsoft. I’ve been using the Thumper TG6 but at ~$5 a pop, it can get pretty expensive to run continuously.

Airsoft Innovations has come to the rescue with its Distraction Device kit. For around the price of a bag of BBs, you can pick up the DD kit which converts the Tornado from a frag grenade to a distraction device.

DDKit_300.jpg

Included in the package is the burst ring, 48 burst discs and the instruction manual. Converting the Tornado to and from grenade to distraction device takes about 30 seconds. If you run into difficulty the instructions sheet will guide you; it’s well written and easy to follow. In any case we’ll go through converting the tornado to a distraction device here.

Base1_600.jpgBase2_600.jpg

First, take off the valve cover from the bottom and then pop off the safety plug with your thumb – hold the cap in your hands with the side with words facing you, then press on the rubber plug.

Cap1_600.jpgCap2_600.jpg

Once that’s done, clean the inside of your valve cover of any dirt, then take a burst disk and tape it into the center of the cap. Now we need to install the burst ring, which will take a few seconds…

Bottom1_600.jpg

Put the burst ring into the circular opening with the O ring sitting in the upward position (if the bottom of the grenade is facing you, you should be able to see the burst ring O ring). Once that’s done, insert the pin, gas up the Tornado, screw in the valve cover and you’re set. You now have a distraction device, which is as close as you can get to a flashbang. To use the Tornado simply pull the pin, throw it into the room and follow in as it goes off.

According to AI, the Tornado generates ~120dB of noise at 3′. While I have no tools to measure this, it is on par with the noise the Thumper makes when I set both off in my condo (wife absolutely loved me testing it over the weekend). With 50 burst discs going for $4.95US from AI, the Tornado distraction device costs pennies to run, making it much cheaper than the Thumper which comes in at ~$5 a shot.

Thumper_Tornado.jpg

Having used and been on the receiving end of the Tornado distraction device at TTAC3 I can say you never know what to expect when a Tornado is tossed into a room. If it’s a frag, you’ll be hit in a few seconds. If it’s in flash bang mode while you’re focusing on the grenade, you’ll be shot by the swarm of people entering the room.

Yeah it works pretty darn well. 🙂